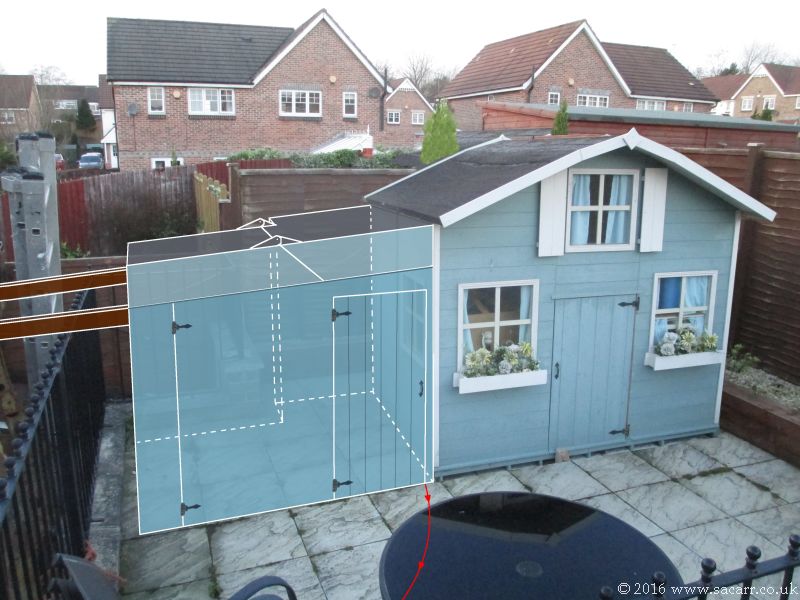
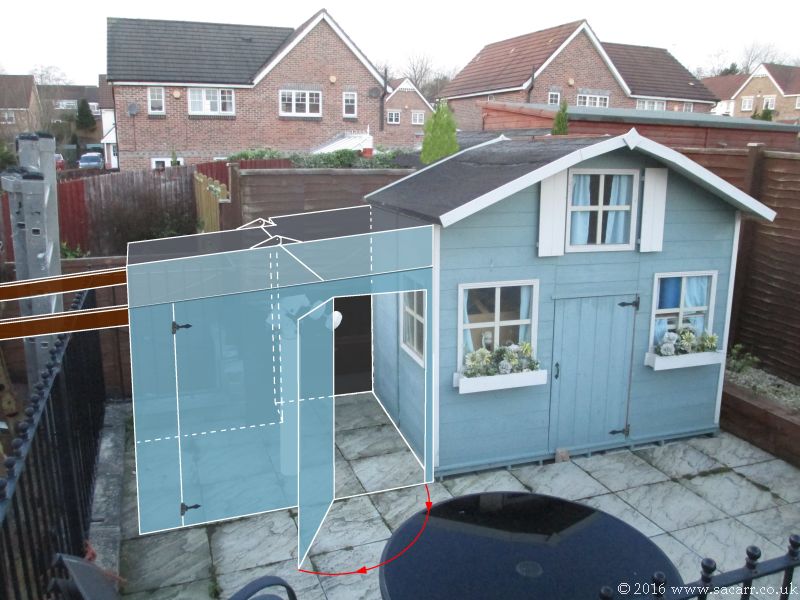
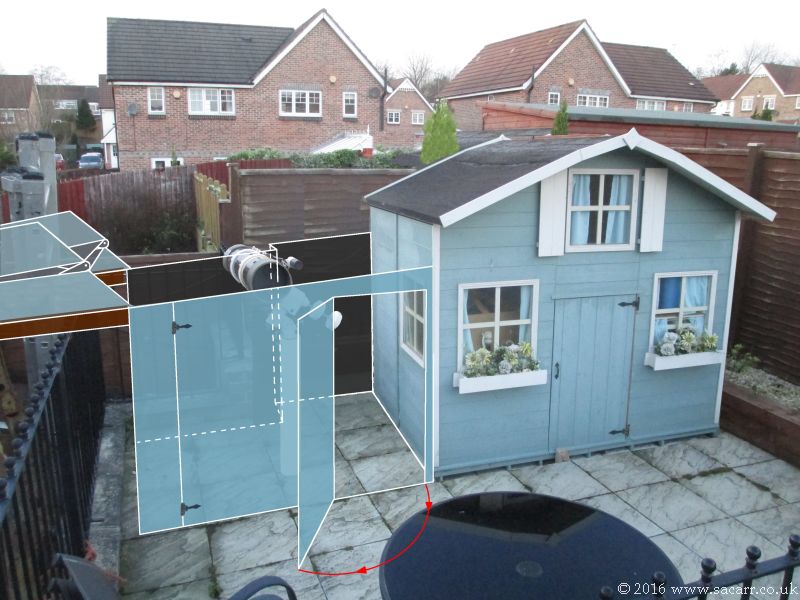
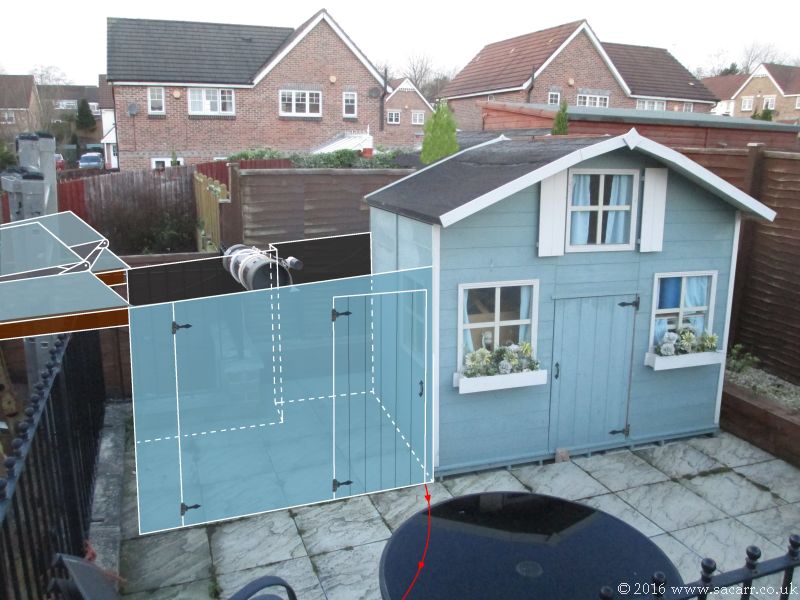
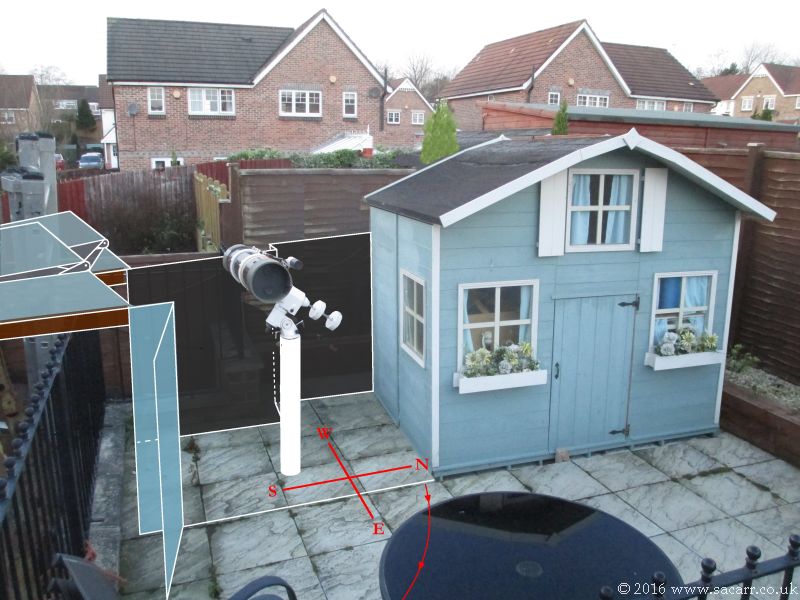
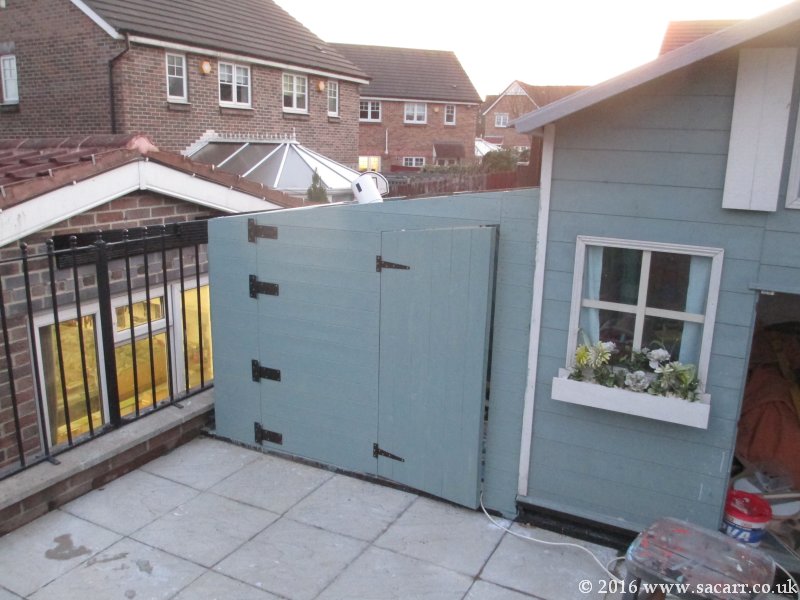
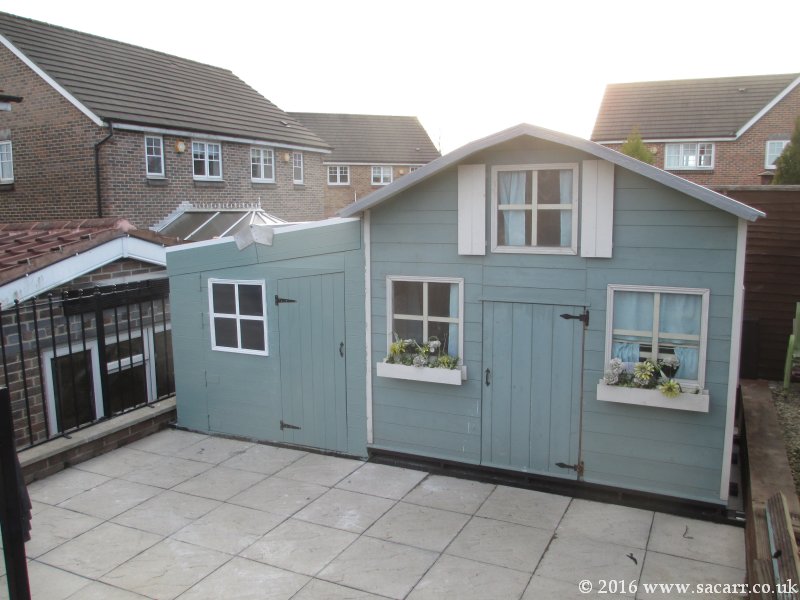
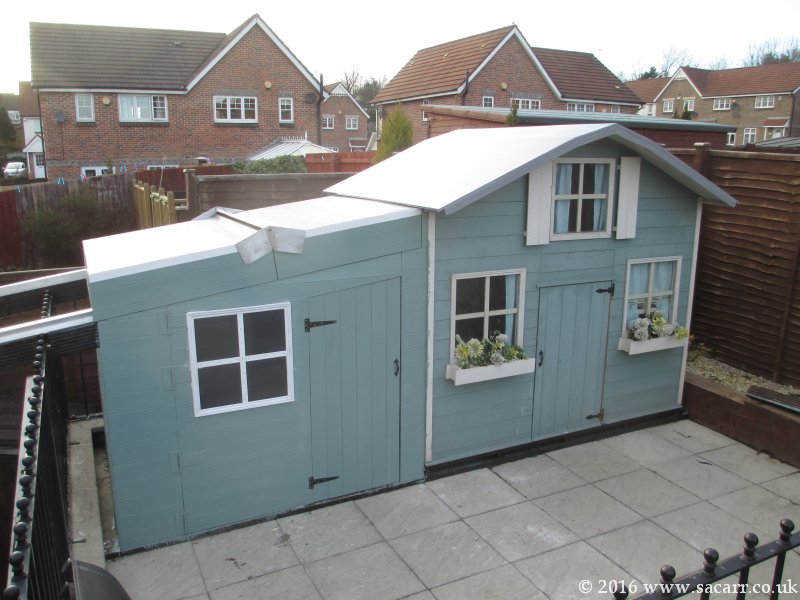
| In
December 2015, I began to wonder if there was space for a permanent
observatory. Carrying all the equipment up two sets of steps to the
patio was a pain, but clearing it away in the freezing cold and when
tired was ever worse. With a little moving of the play house, I
would have space for a 5 x 4 feet shed on the side of the play house.
This would also mean less materials, as one wall was already built. The
images below show the planned idea, and the various configurations for
getting in and observing and imaging. |
|||
 |
 |
 |
 |
 |
 |
 |
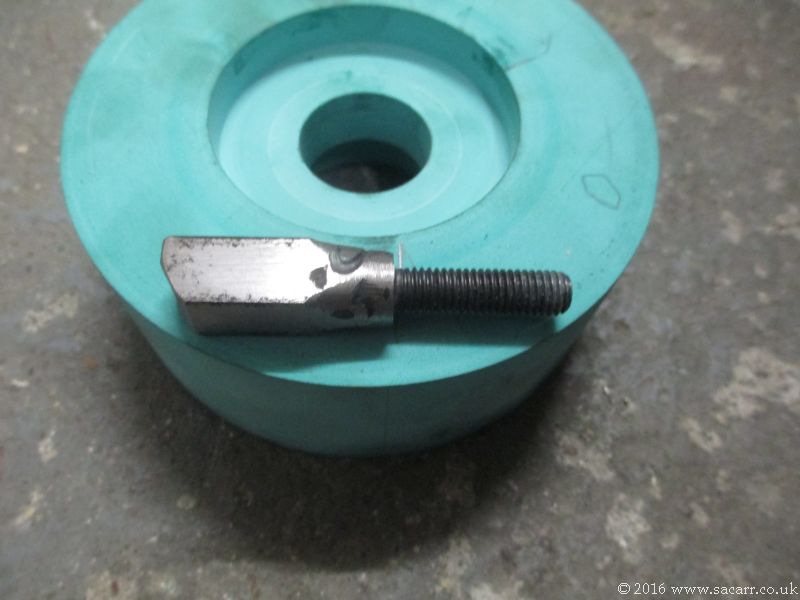 |
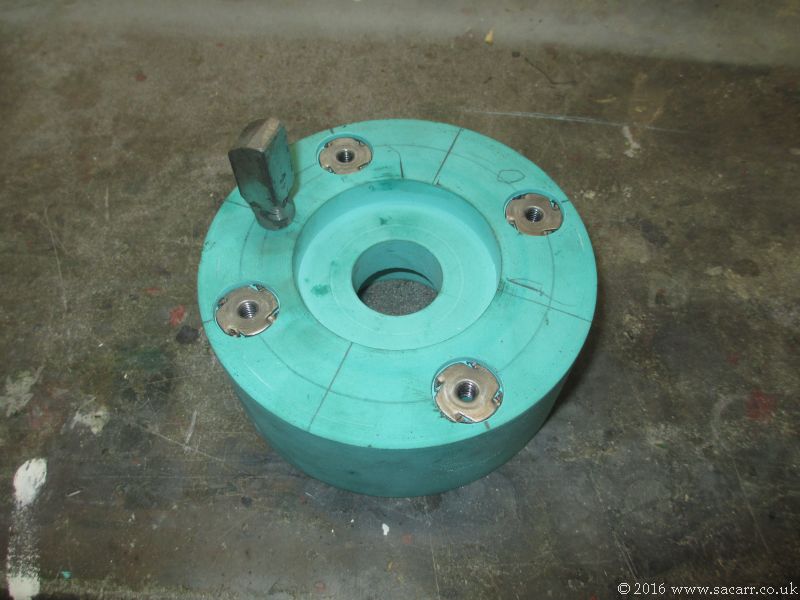
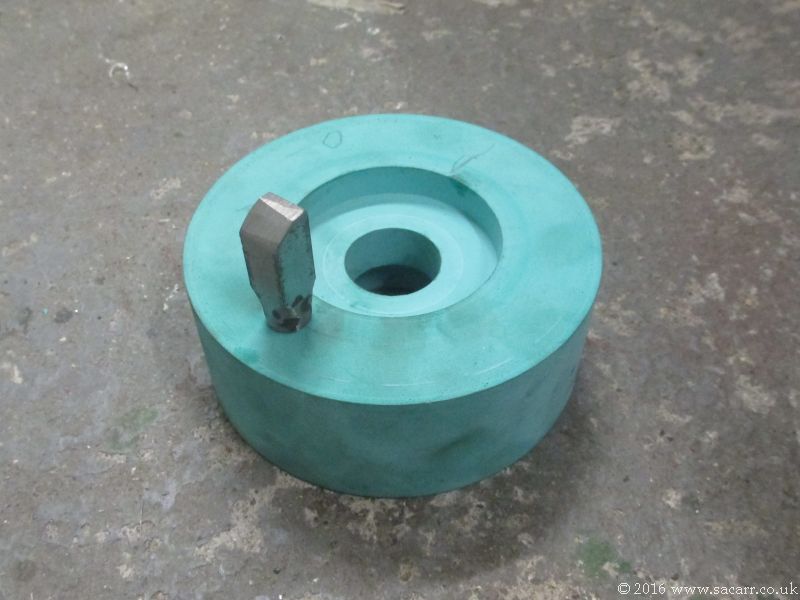
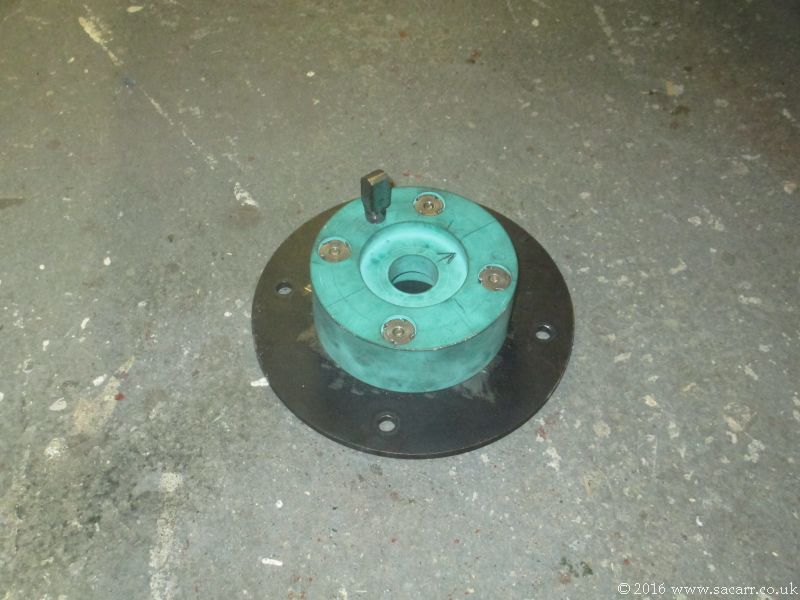
| Jan 9th - The pier adapter was turned from dense modelling resin. A polar alignment peg was made from a machine screw and some square bar welded together. This adapter will be bolted to the steel levelling discs which will be attached to the concrete pier. | 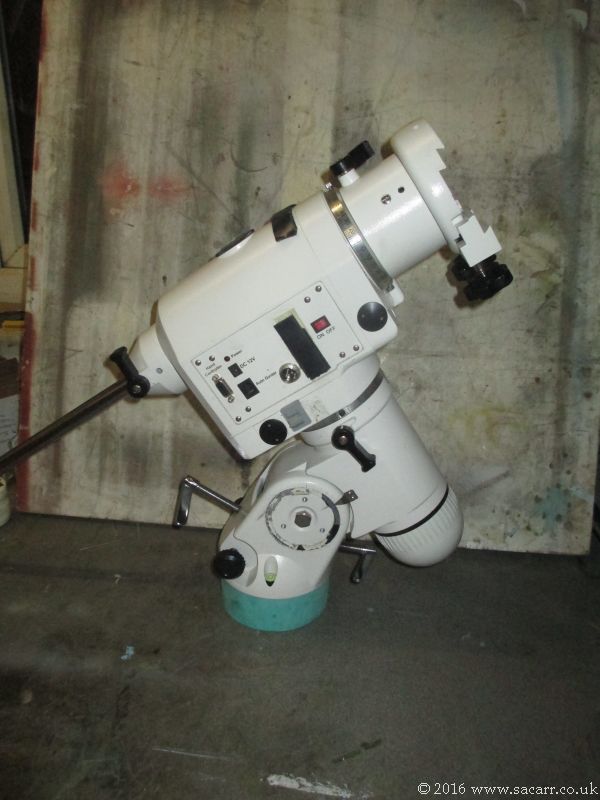 |
The mount adapter was drilled for the M6 bolts that attach it to the levelling plate. The top side of each hole was then recessed for a 'T' nut. The 'T' nuts will be epoxied in place eventually.
|
|
 |
 |
||
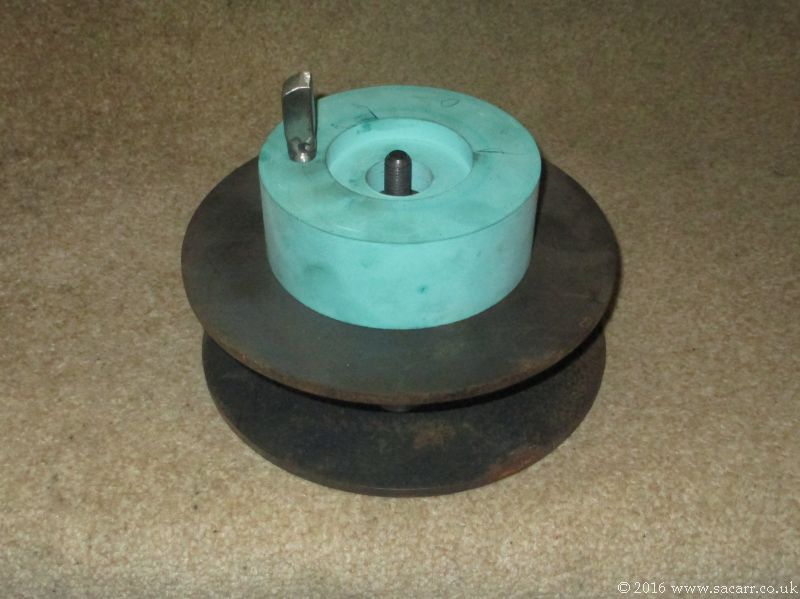
| Jan
12th - Next, the steel plate was drilled for the large central bolt, and the four fixing bolts. I've only got a hobby sized pillar drill, so to reduce the strain on the drill, the central hole was drilled to 6mm to start with, and then I worked up the drill sizes until the bolt fitted. The fixing bolt holes were then drilled and the bolts test
fitted. The central bolt will probably have a steel plate welded to the head, with a hole for a padlock to pass through. It can then be screwed into the mount and padlocked in place to prevent easy
removal.
The last couple of pictures
show the mount assembled onto the adapter and levelling plate. Next job will be drilling both steel discs for the levelling studding, and also for the studding that will attach the lower disc to the concrete pier. |
|||
 |
 |
 |
 |
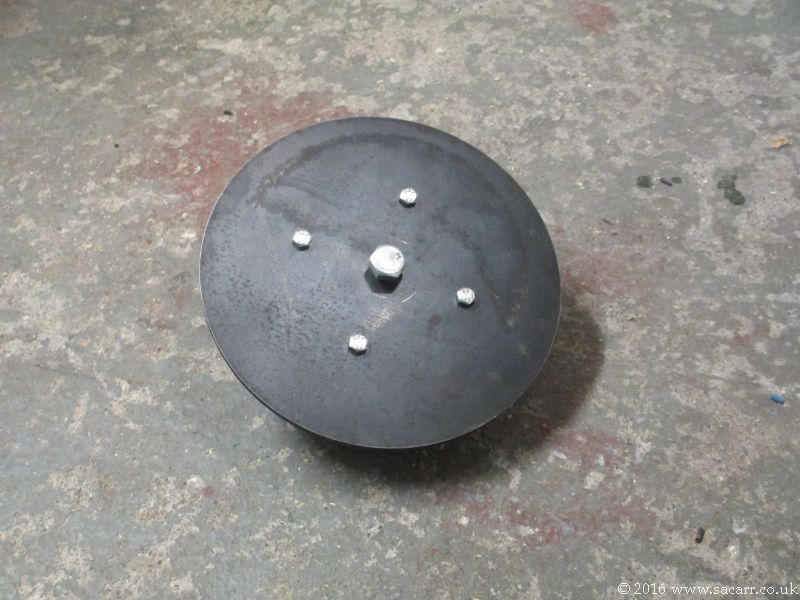
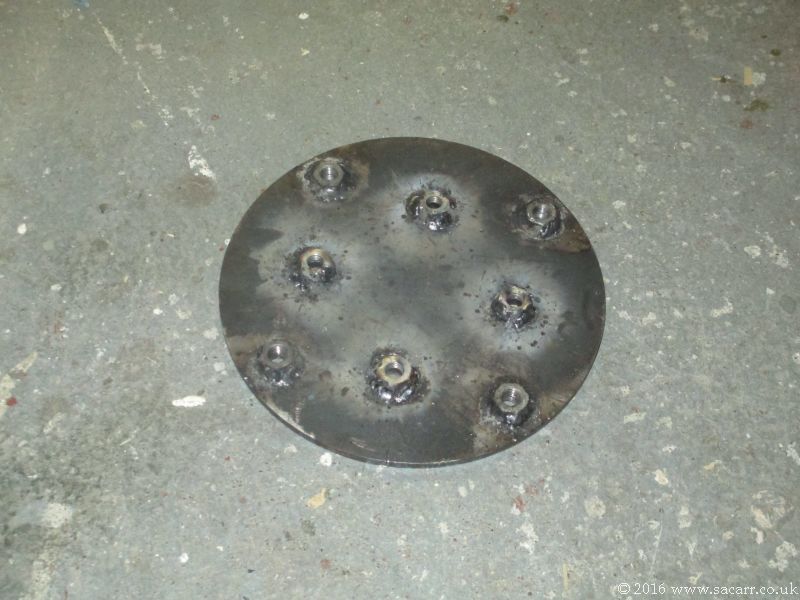
| Jan
21st - The
levelling plate was drilled for its bolts and the lower plate had eight
nuts welded to it to attach the bolts and the fixing bolts that would
attach the discs to the concrete pier. It was then trial assembled. It
still needs the discs sand blasting and painting. |
|||
 |
 |
 |
 |
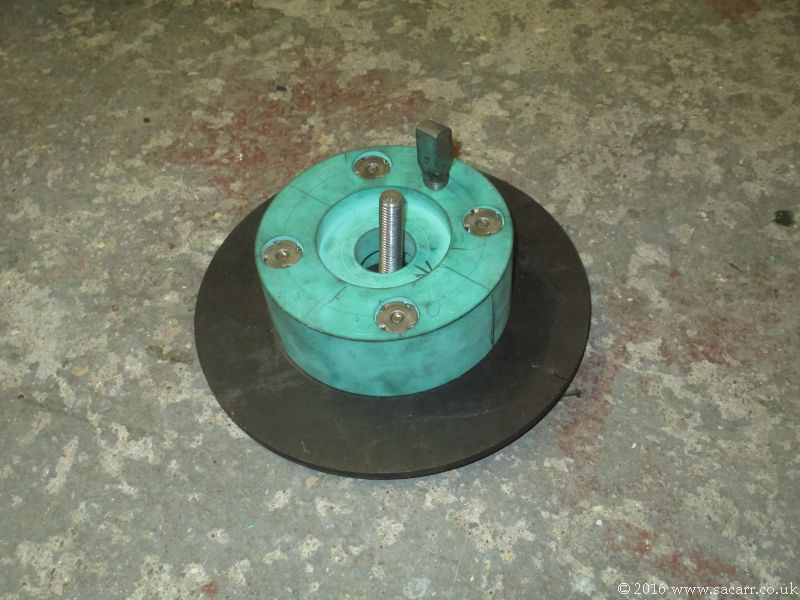
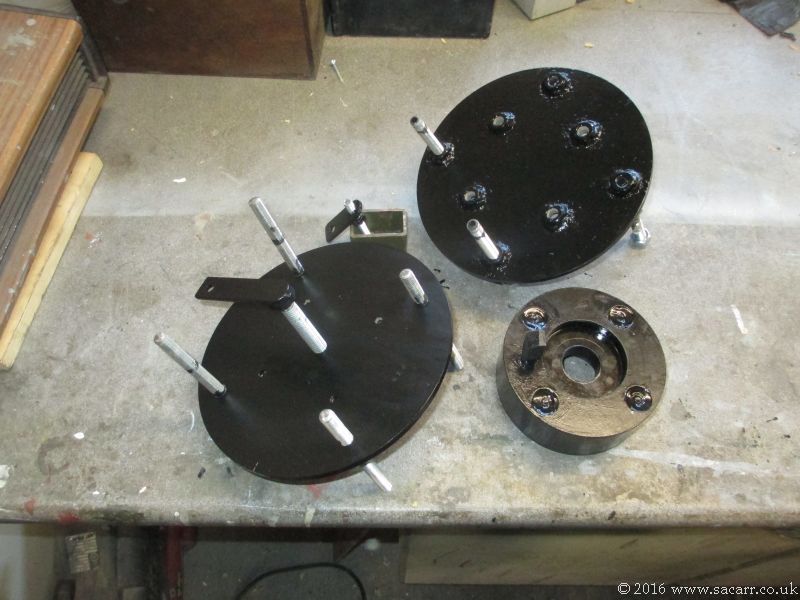
| With
all the parts complete, they were sand blasted and painted in some satin
black paint left over from my Jeep restoration. |
|||
 |
 |
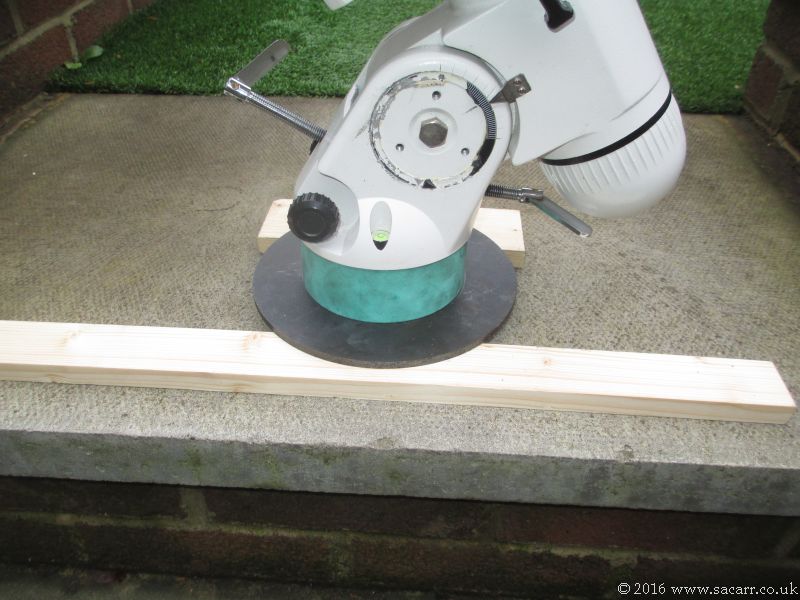
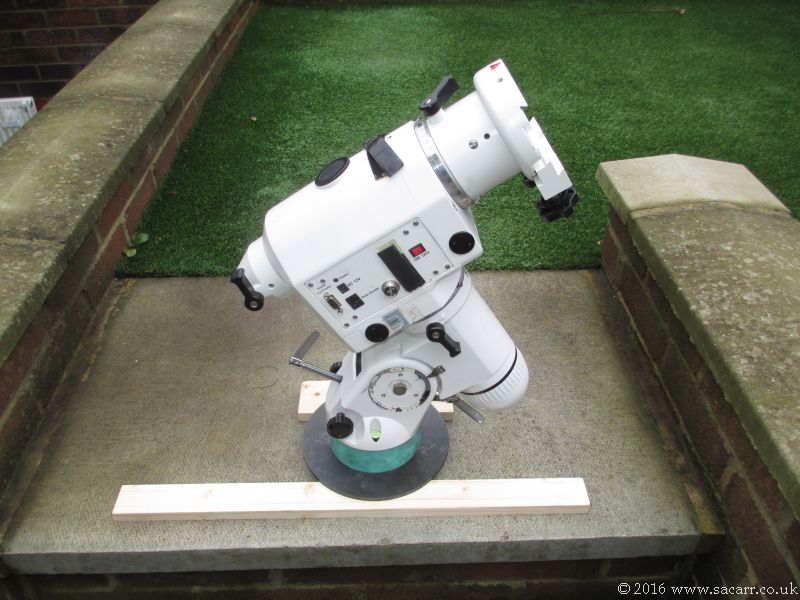
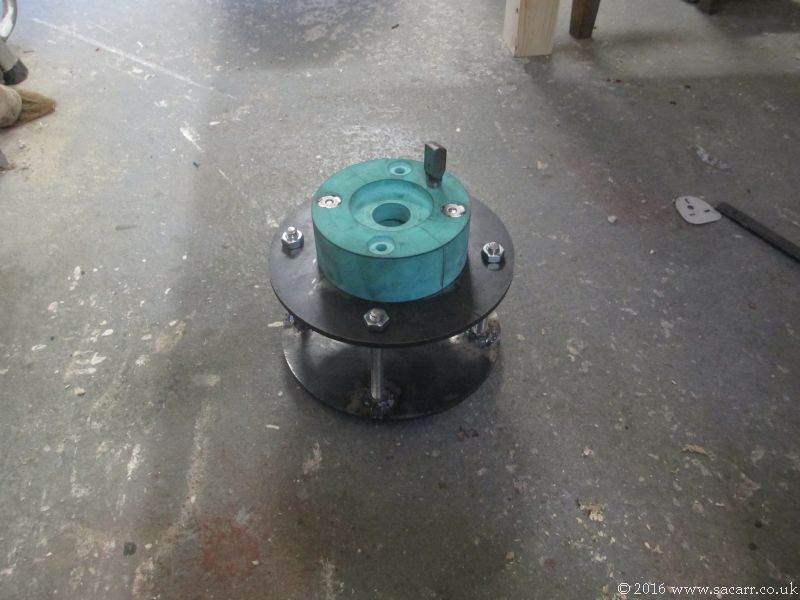
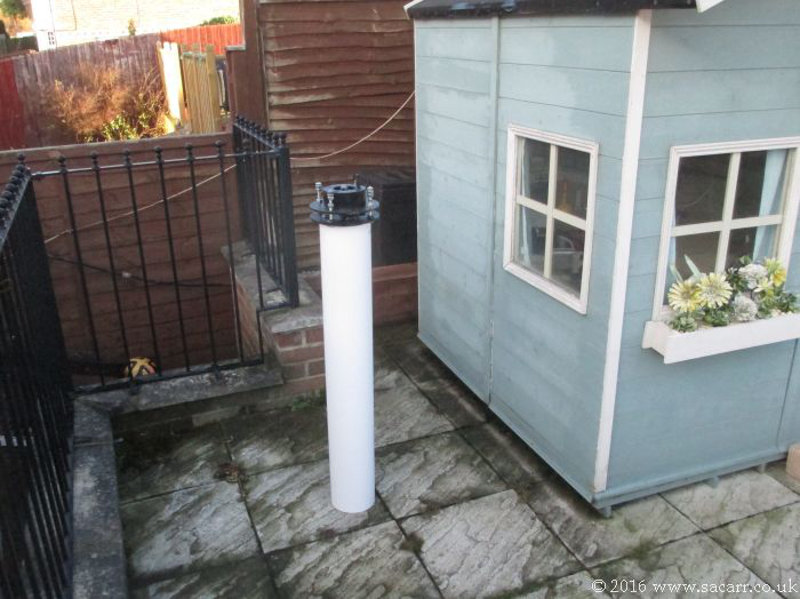
Jan 22nd - Having worked out the minimum height the plate can be, while allowing me to tighten the central NEQ6 fixing bolt, I made the spacers to hold the plates apart. These are tubes of about 1 1/4 inches diameter, trimmed on my lathe, and they drop over the levelling plate bolts. Of course, being an EQ mount, there's no real need for levelling, just pointing at Polaris, so perhaps attaching plate would be more appropriate. | |
| Jan 31st - The bolts clamp the attaching plate down onto these tubes, giving a nice wide and firm footprint to sit on, while leaving about 40mm of clearance for the central fixing bolt. After this picture, it was taken apart again and the parts painted. A few days ago, the postman brought a metre long plastic tube for my pier. The tube and the pier adapter were put out on the patio for a picture in their approximate location in the observatory. Not an easy task given the wind around here over the last few days. | 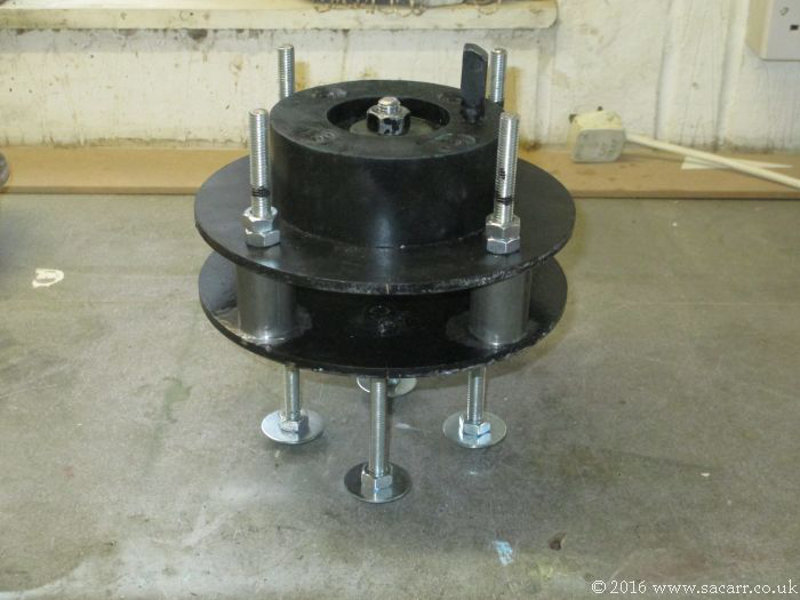 |
 |
|
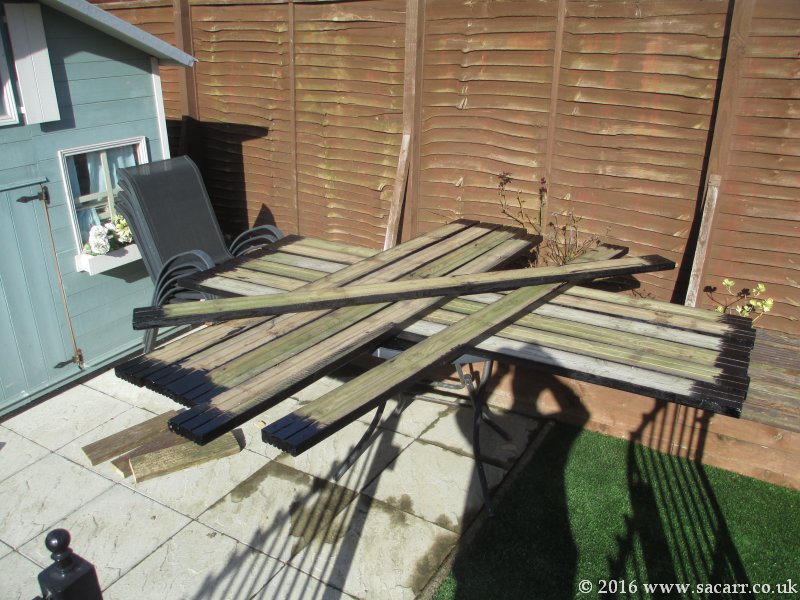
| Feb
8th - Today I had a hard morning of lifting and carrying! 23 off 5 metre decking planks collected from the yard where I keep my WW2 Dodge. Loaded onto the roof rack, driven home, and unloaded in through the lounge window to get a straight run through to the back garden. ( the garage is too full of Jeeps to get past through there! ). |
|||
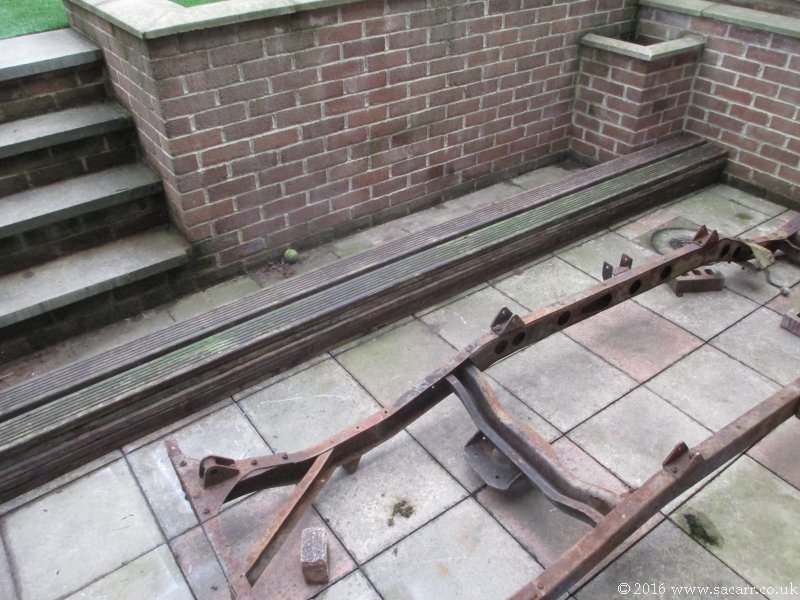 |
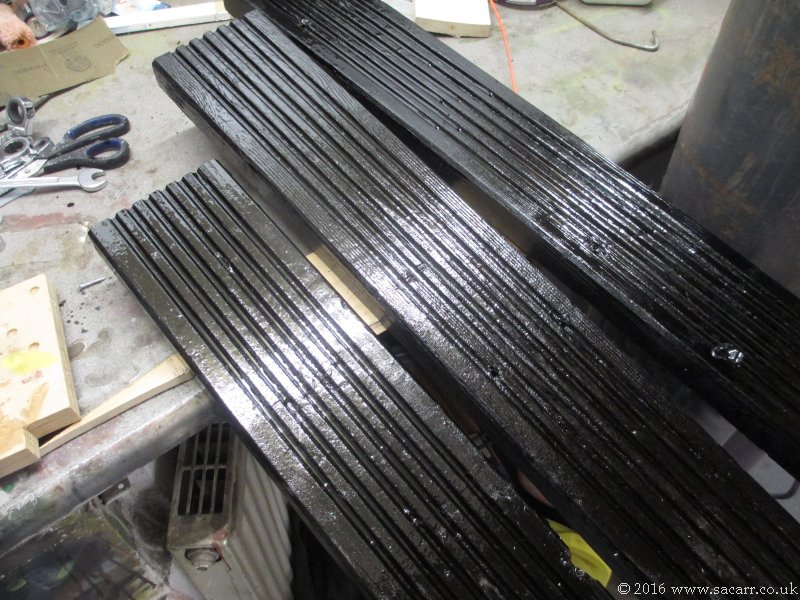
Almost all
are very dense and heavy; there's just a couple of what feels like softwood planks
that are much lighter in weight. They can be used for internal structure in the observatory. Fortunately, the Jeep chassis on the patio is on the way out the door shortly, having found a buyer about a week ago. The next job will be to pull out all the hammered over nails, and give the planks a wash and scrub to get the algae, dirt and flaky paint off. |
 |
|
| Feb 26th - The first of the planks were cut to size today, to form the footprint of the playhouse and observatory. One or two planks had some 'shakes' along the grain, so they were first painted with dilute PVA glue to seal the splits. After that, they were given the first of a few coats of a bitumen paint, to seal and waterproof them. These 'footprint' planks will be fastened down and the playhouse and observatory attached to them to make one structure. The gap will allow a little airflow below to reduce damp. |  |
 |
|
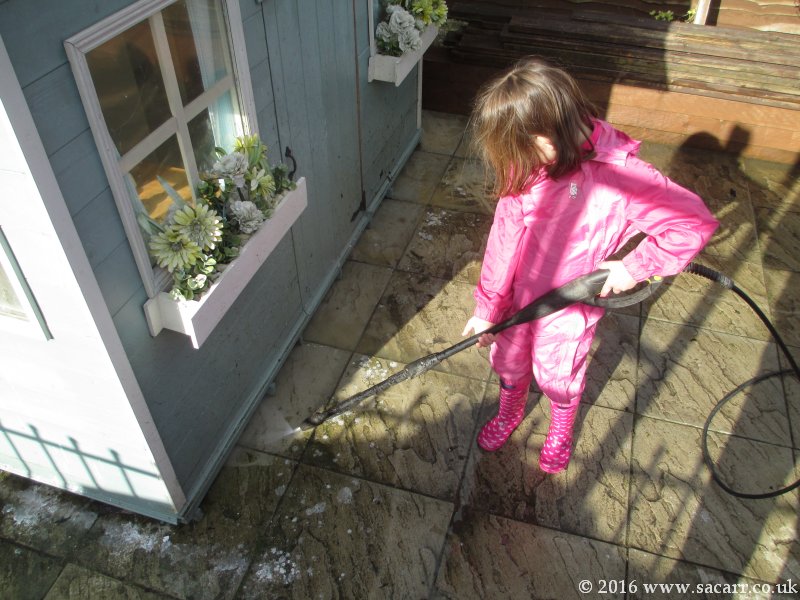 |
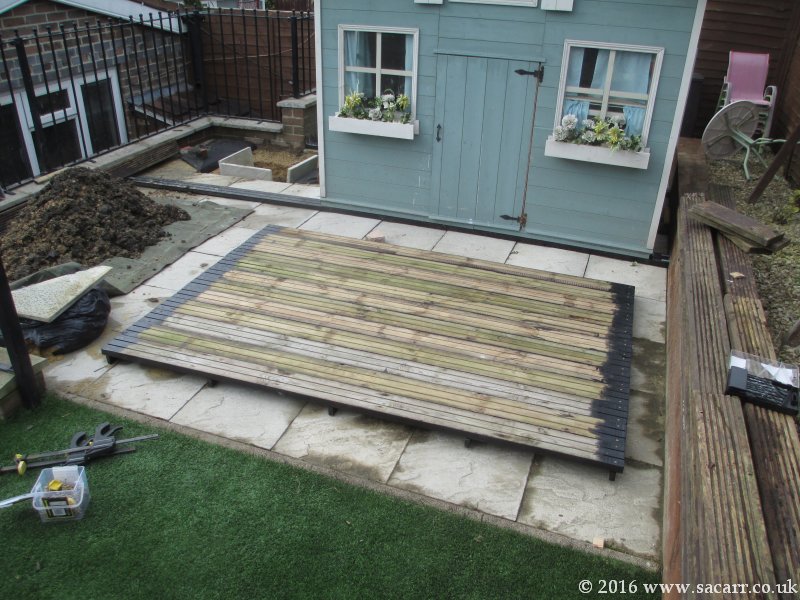
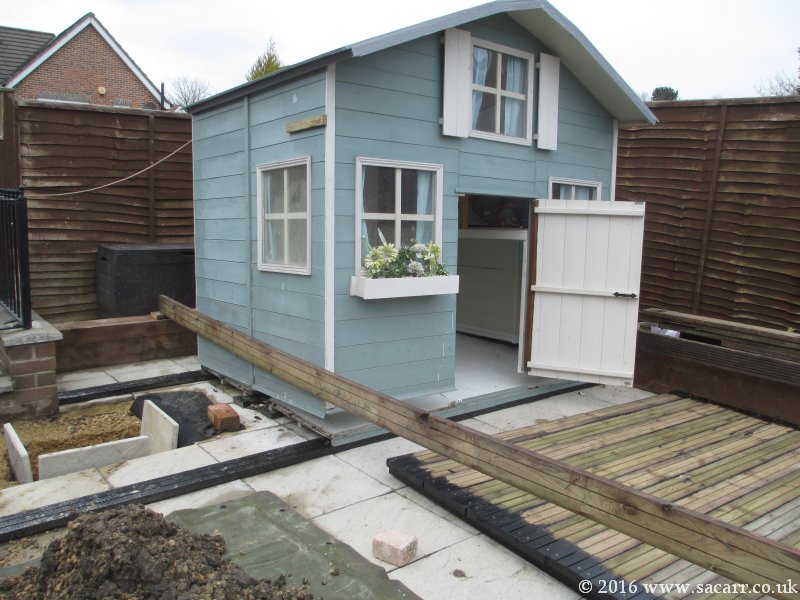
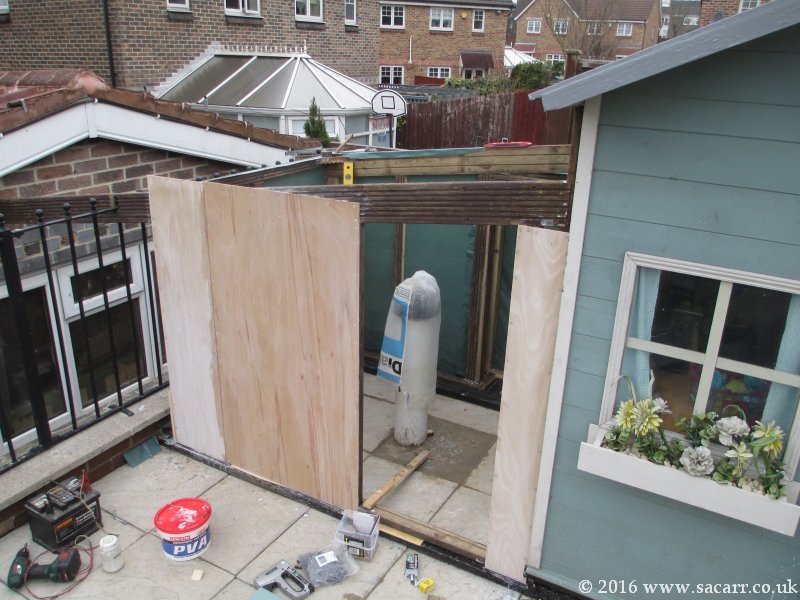
Feb 28th - The next step in the build was to clean the patio, prior to moving the play house. All around the front and sides was jet washed, leaving the patio flooded in about an inch of water. Two paving slabs were lifted to help the water drain faster. Once the water was gone, the patio was swept of weeds and dirt left by the water. | 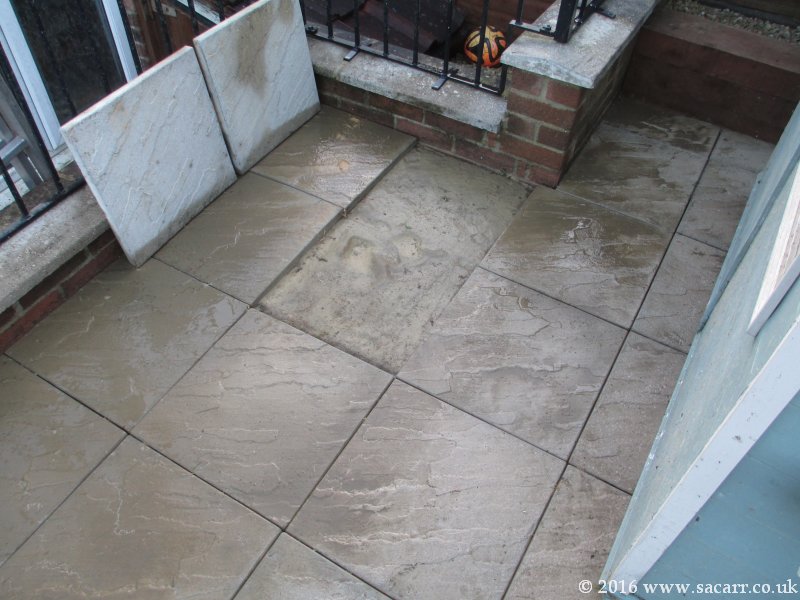 |
|
 |
Feb 29th - The following day, the play house was jacked up on some scraps of wood to reduce friction on the ground. The first of the bitumen painted foundation planks was fitted across the patio, just in front of the play house, and then I was ready for the move. I fitted straps around the play house, and attached a ratchet winch to the straps and to a fence post. | 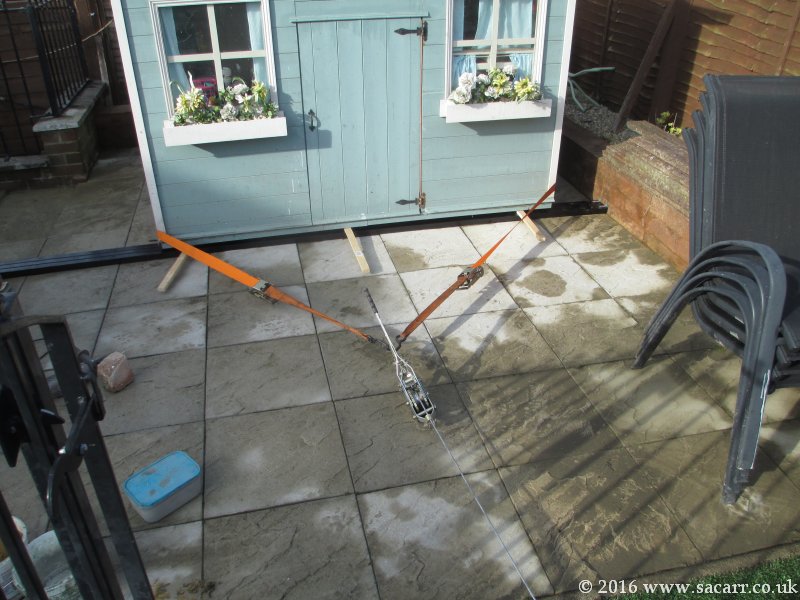 |
|
 |
Slowly
the tension was increased until the house moved forwards, and at the
same time, it was shoved to the right, close to the sleepers around the
edge of the patio.
The front edge of the play house was lined up with the decking plank, while the back of the house was lifted a bit higher. This allowed the fitting of the rear and centre decking planks that support the play house floor joists. |
||
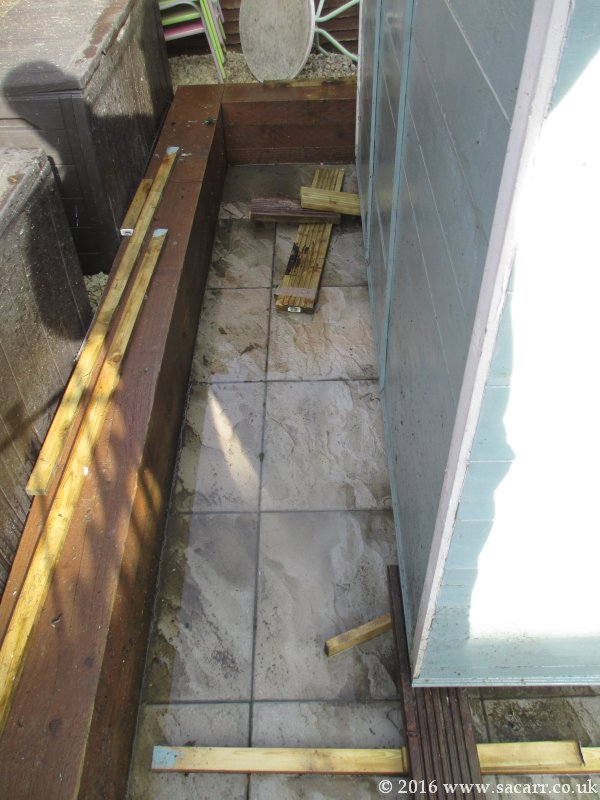
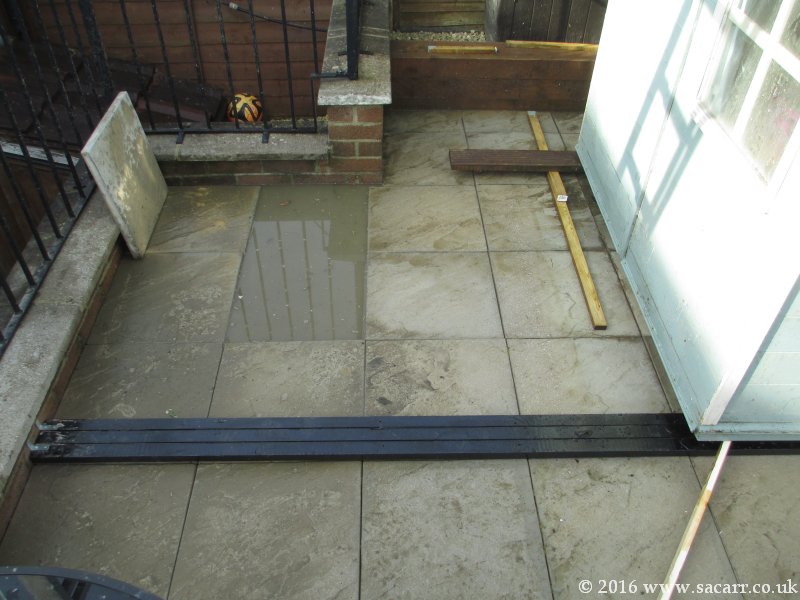
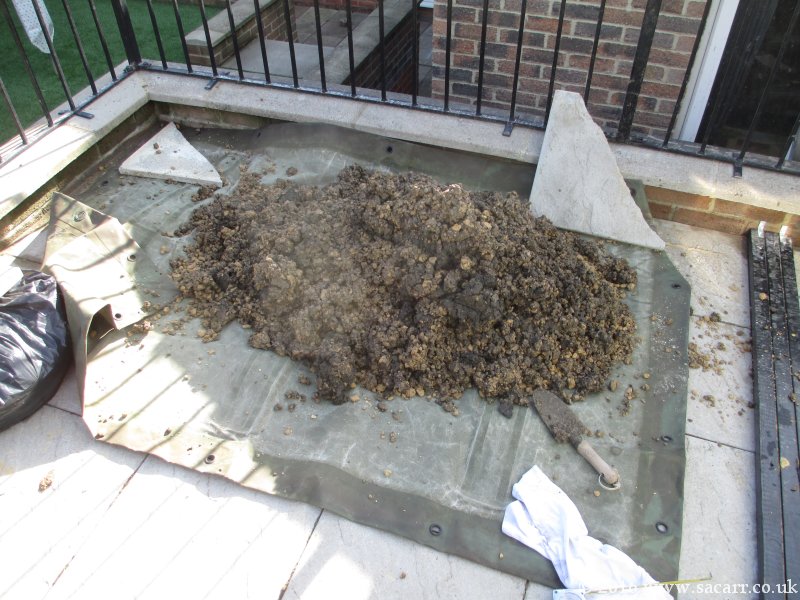
| With all the supporting planks fitted, the wooden blocks were removed, and the play house lowered onto the foundations. Two more paving slabs were lifted around the pier position and the bedding sand cleared away. Below the sand was the weed barrier, and this was then cut and folded back out of the way, revealing the packed hardcore below. This will take some effort to dig out. | 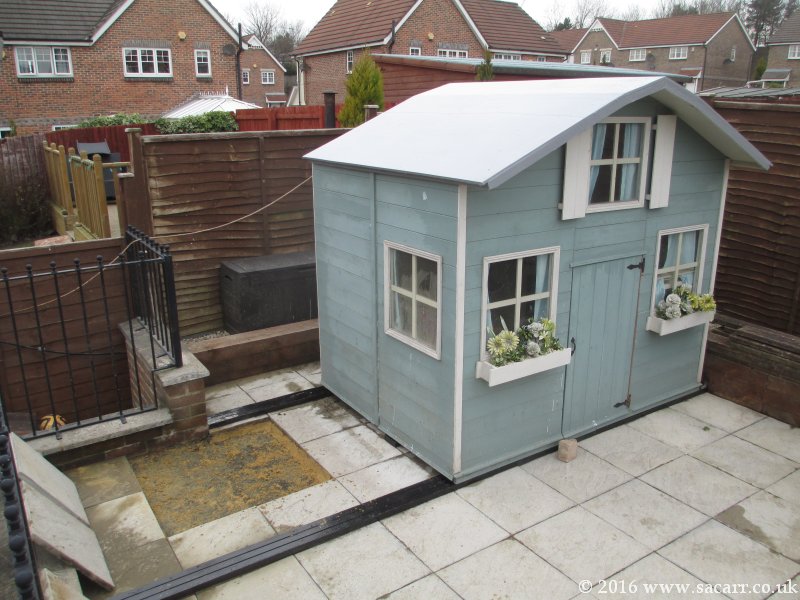 |
 |
|
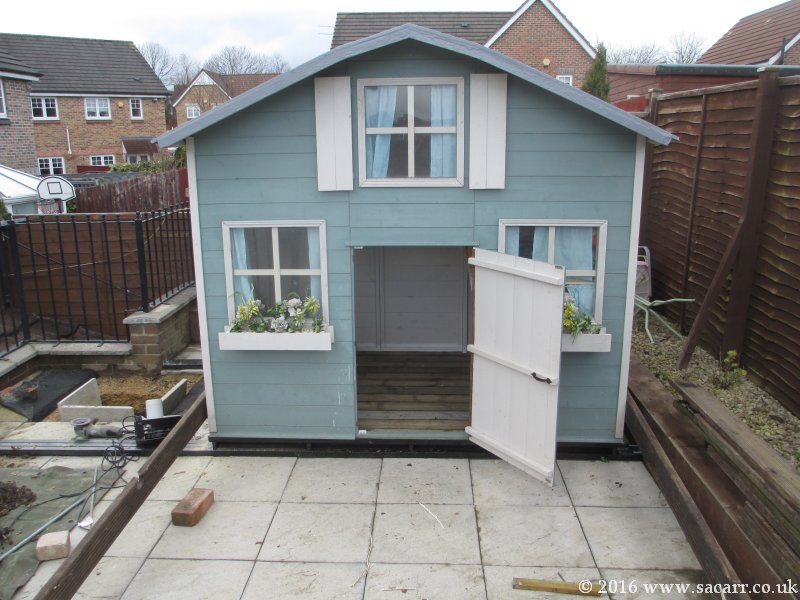
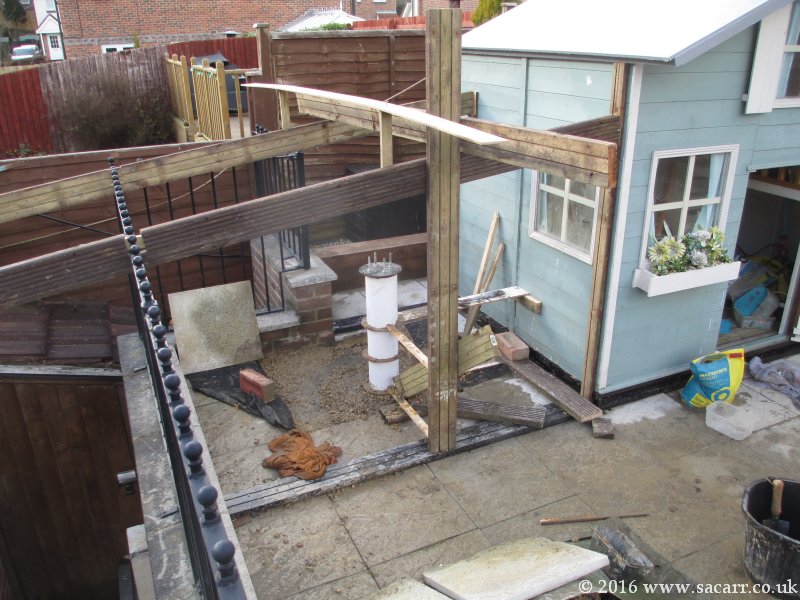
| Mar 2nd - Further investigation of the play house revealed that the chipboard floor was actually rotten. I decided that the best option was to replace the whole floor. I cut six of the long decking planks into twelve, seven feet long planks for a new floor. They were painted with more bitumen paint on the bottom face and left to dry overnight. While they were drying, out came the mini pick axe, and I started work on the pier foundation. | |||
 |
 |
 |
 |
| Mar
3rd - With the decking and some support strips dry, I began to assemble
the new floor. It is substantially heavier and stronger than the
original floor. Fitting it was the next challenge. I screwed two further
decking planks, one to each side of the house, to form long levers.
After the old floor was unscrewed from the walls, the long planks were
used to lift the house up and clear of the floor. That was pulled out
and the new floor lifted into position, followed by screwing the walls
down to the new floor.
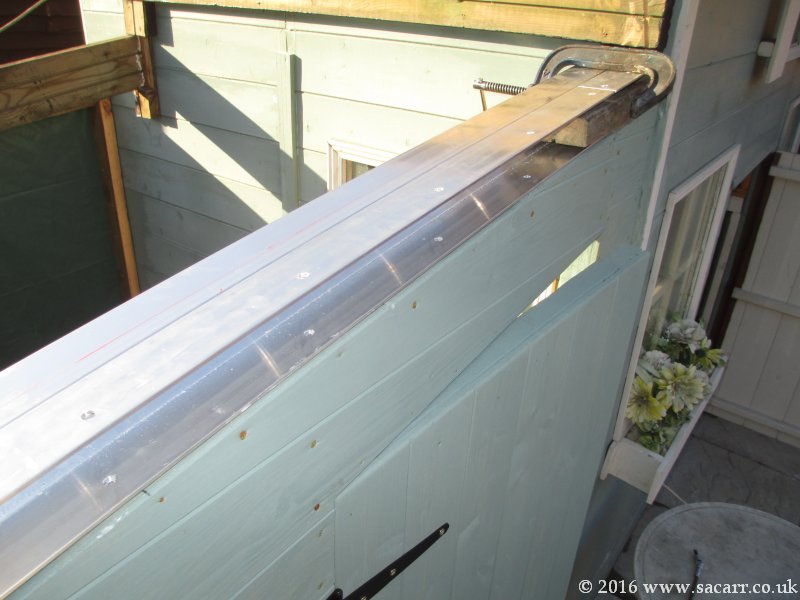
Once the floor was sorted, I moved on to the observatory roof runners. I needed to know the height of the roof in order to work out the height of the telescope and also the pier, so it would clear the roof as it was opened. Two more decking planks form the support for what will be an aluminium channel. |
|||
 |
 |
 |
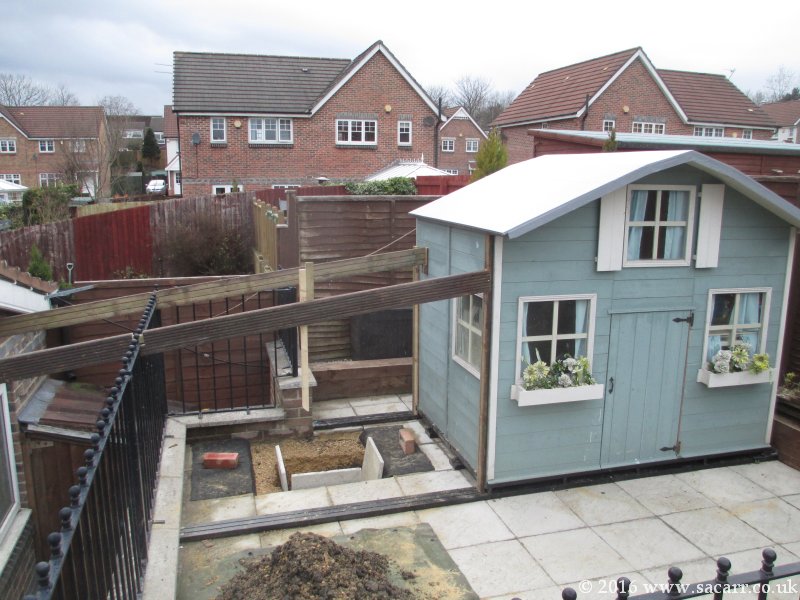 |
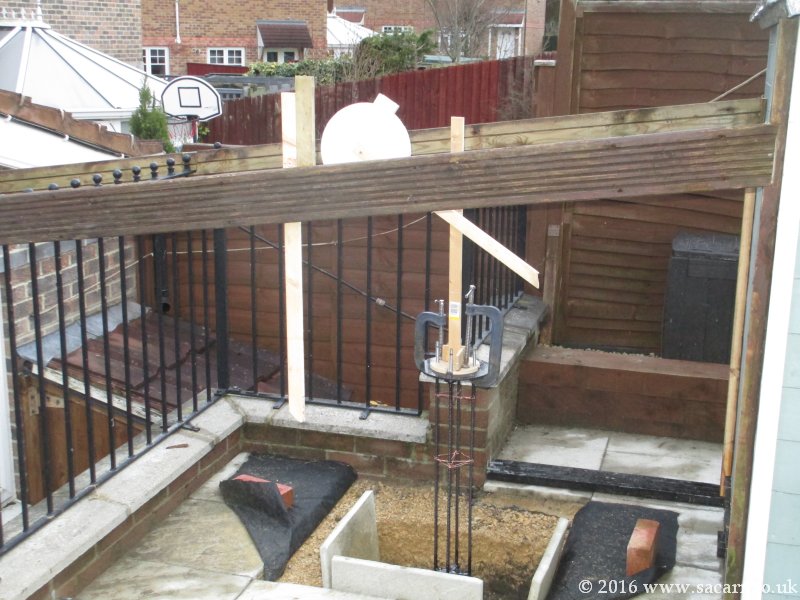
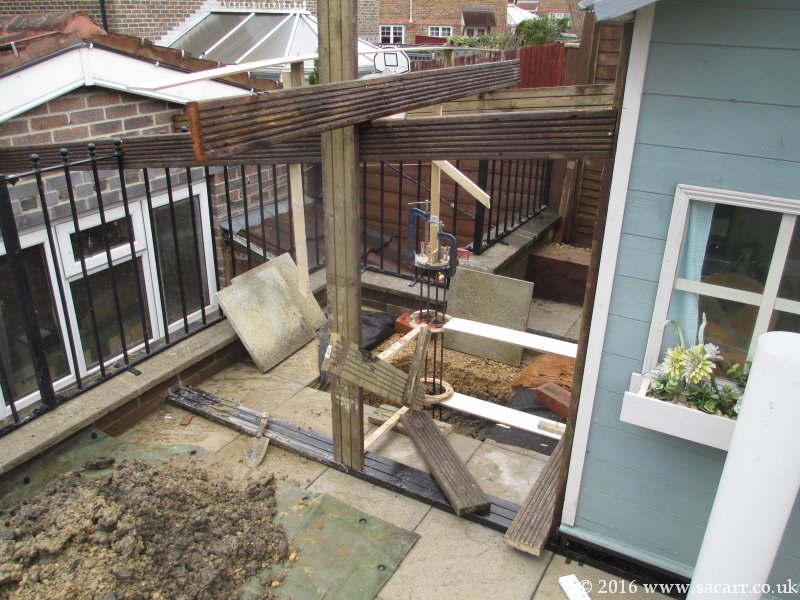
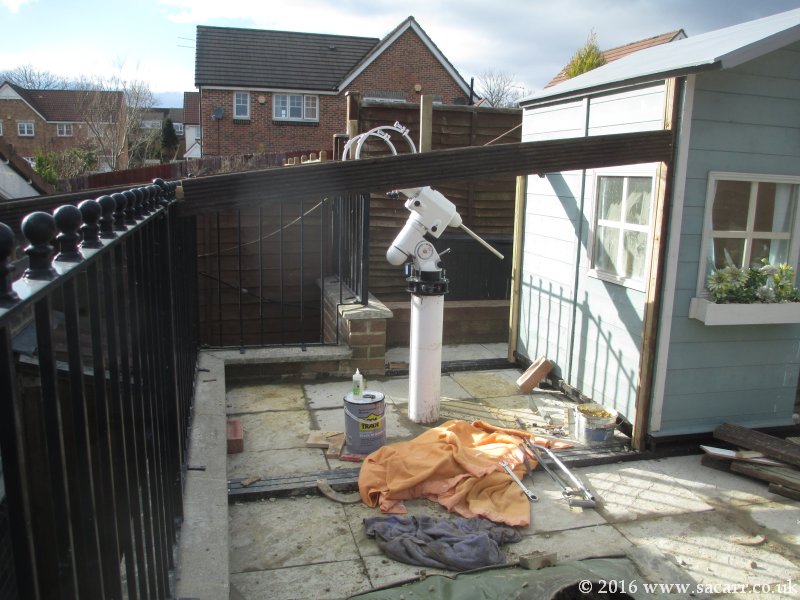
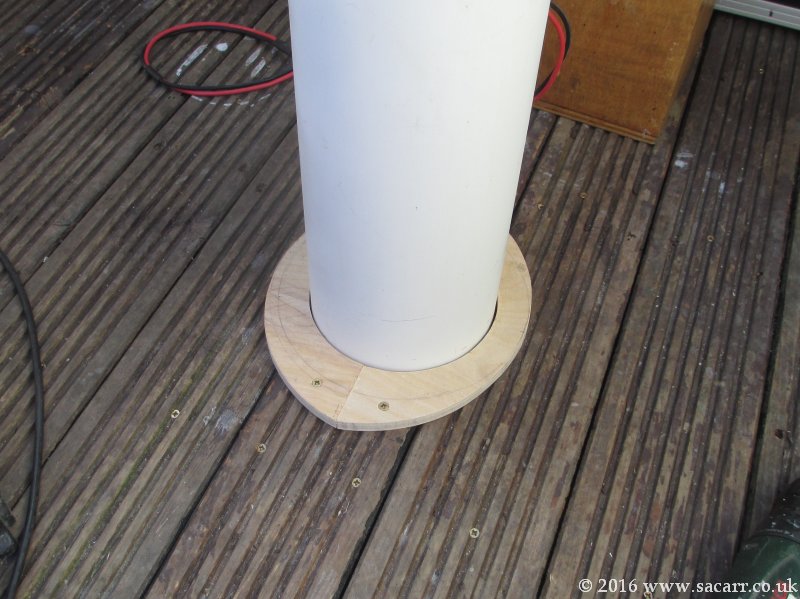
| Mar 4th - On the 4th, I fitted a dummy mount and telescope to the skeletal pier structure to calculate the pier height. | 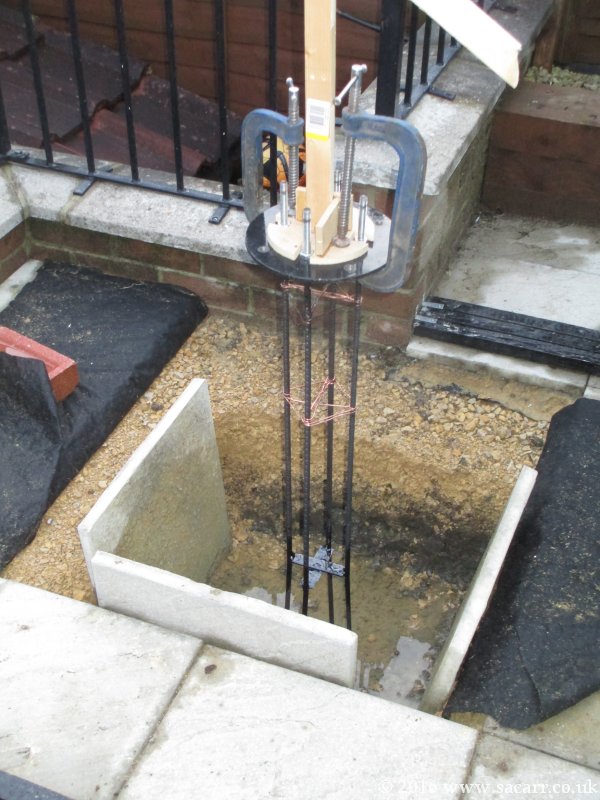 |
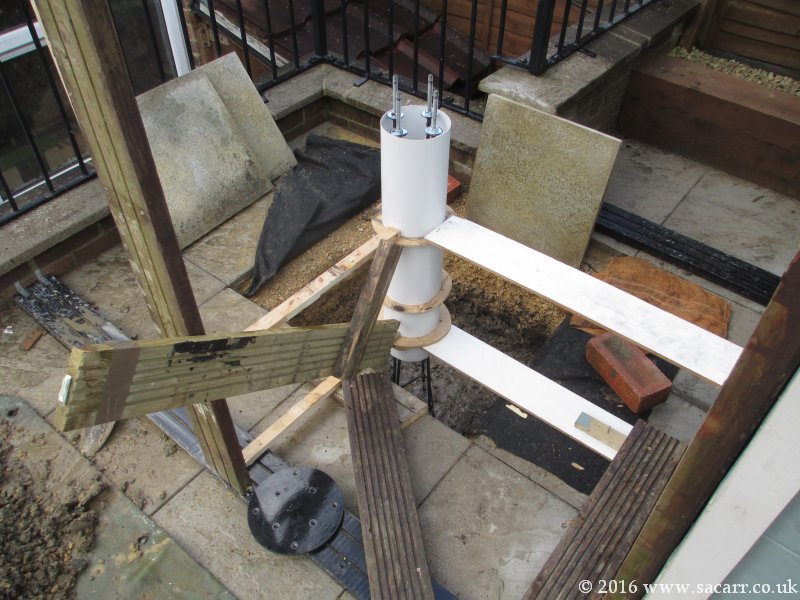
The reinforcing bars were pushed into the bottom of the hole until the dummy telescope cleared the position of the roof. That gave me the height of the pier tube which was cut to length. The plastic tube was then jigged up to hold it vertically. | |
 |
 |
 |
|
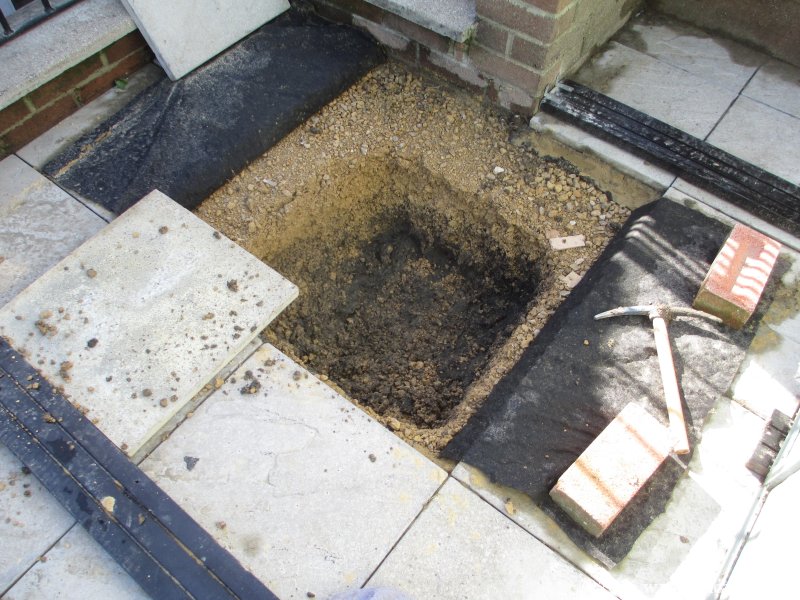
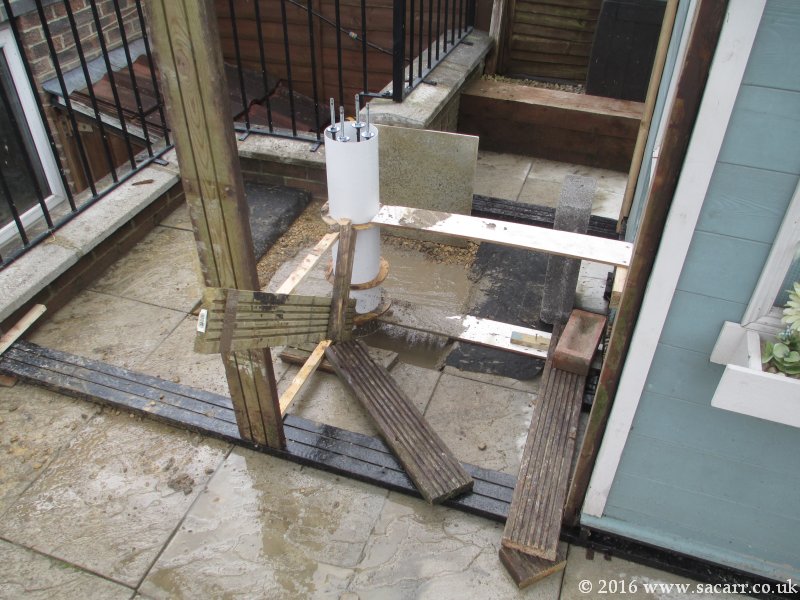
| Mar
5th - After a little more clearing out the bottom of the hole, I had a
trip to B&Q for concrete and started mixing. I filled the pier
foundation and then left it a little while to start to cure and harden a
bit. I then used the clay/gravel spoil from the hole to cover over the
concrete to protect it from the cold and to stop the pier concrete from
slumping down the tube and out of the bottom. Once the pier was filled,
it was all left overnight.
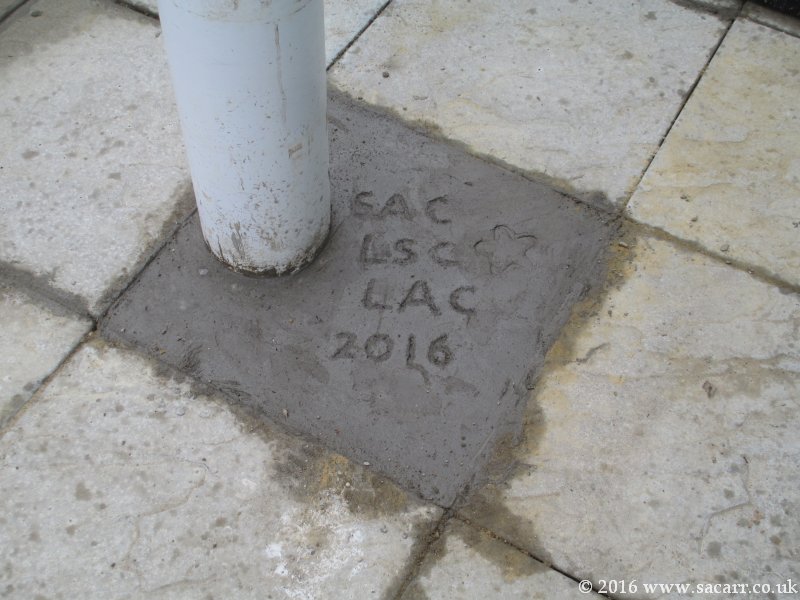
Mar 7th - the spoil was cleared and levelled and then the weed barrier was folded back into place. A layer of sand was spread out as a bed for the paving slabs, and the area around the pier was filled with concrete and we all signed it. After it hardened a little, it was covered up with some old blankets as frost was expected that night. |
|||
 |
 |
 |
 |
 |
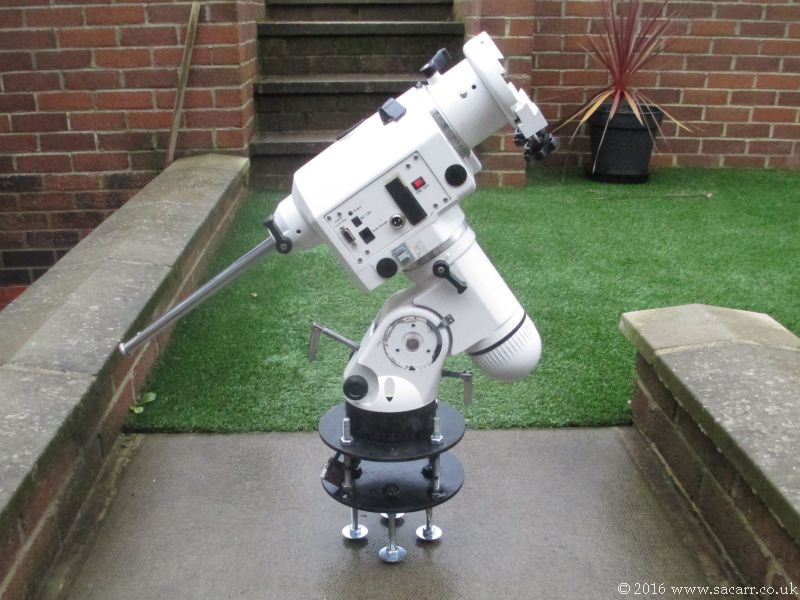
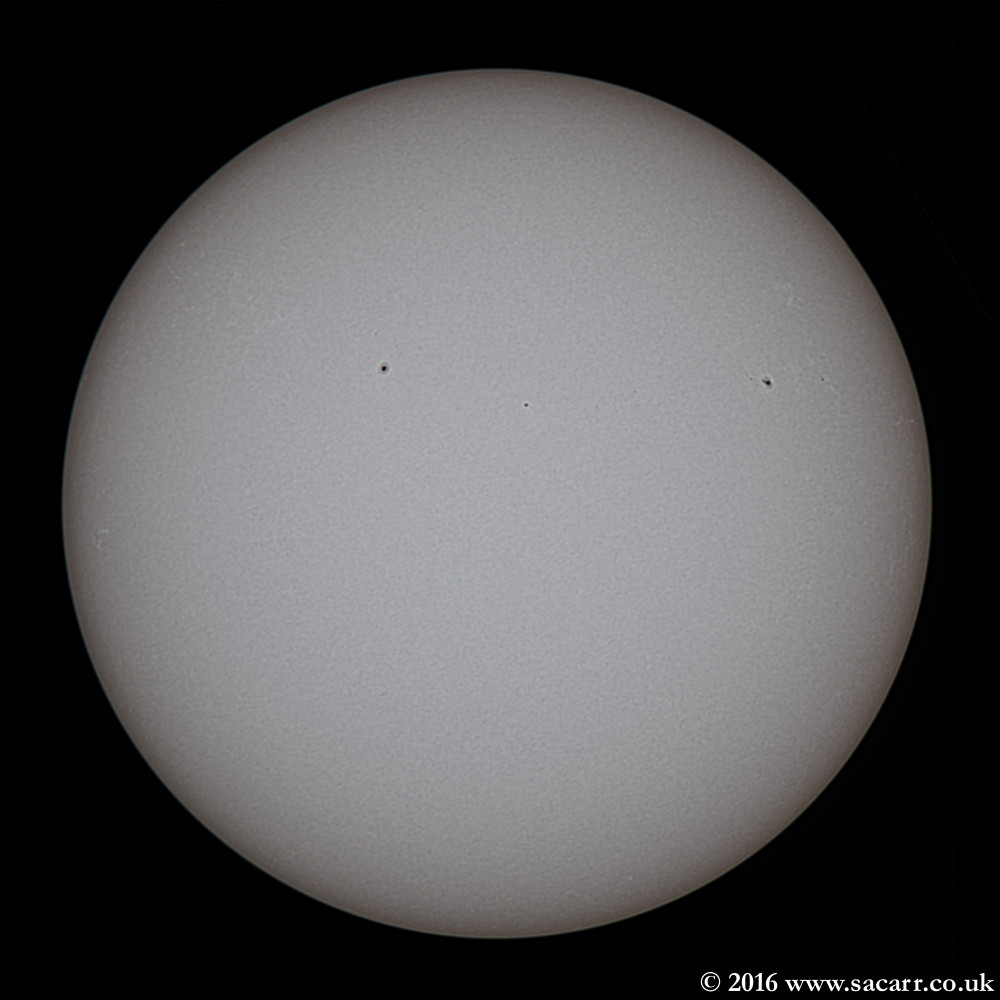
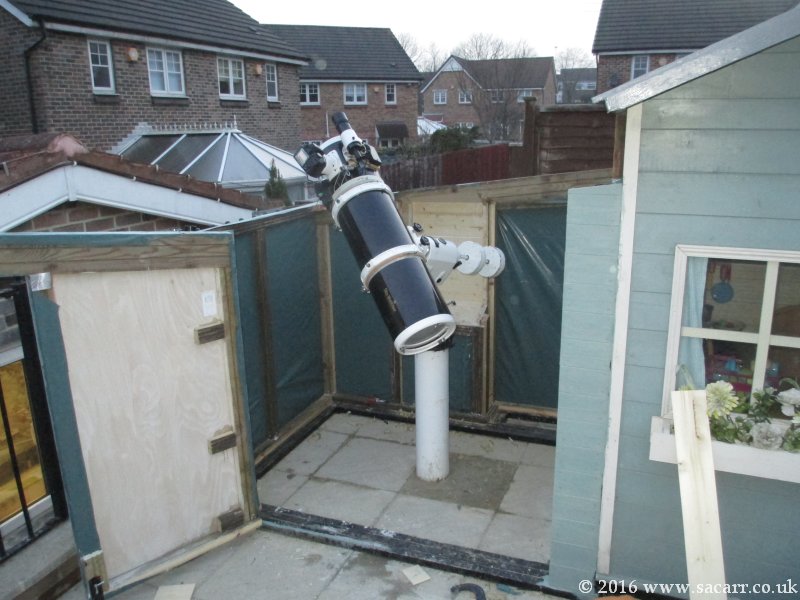
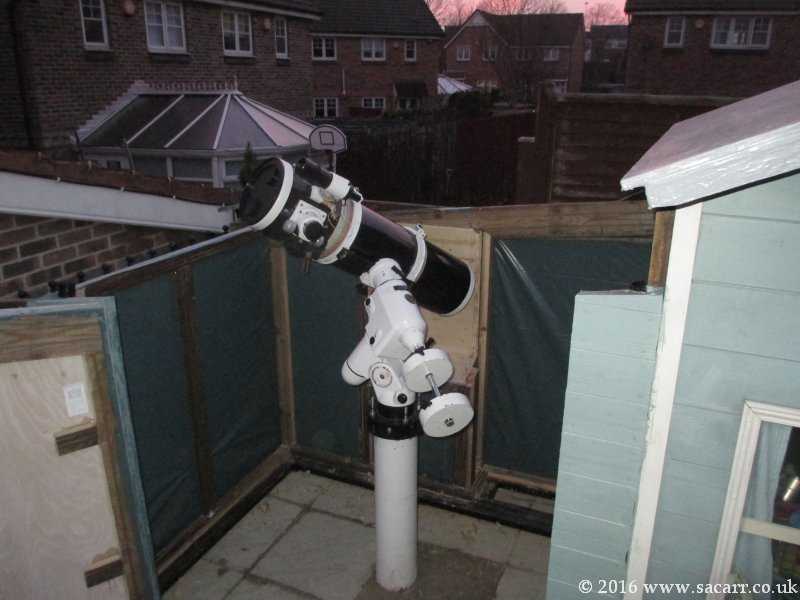
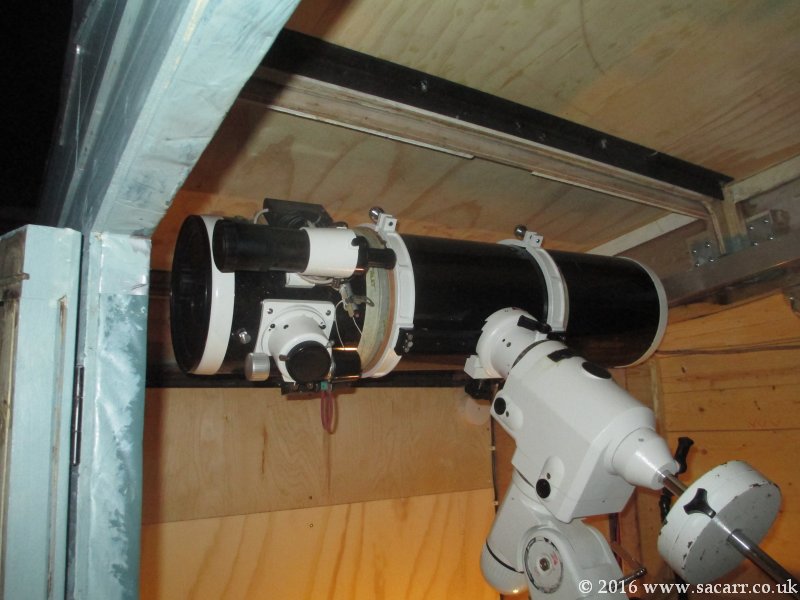
Late in the day, the mount and 8 inch tube rings were fitted to the pier to check the roof would actually clear the scope. Thankfully, my measurements worked out and it was clear. The 8 inch tube rings were then removed, and the Evo 80ED was fitted for a quick solar shot, and while the mount wasn't powered at the time, it was first light for a scope on the pier. | 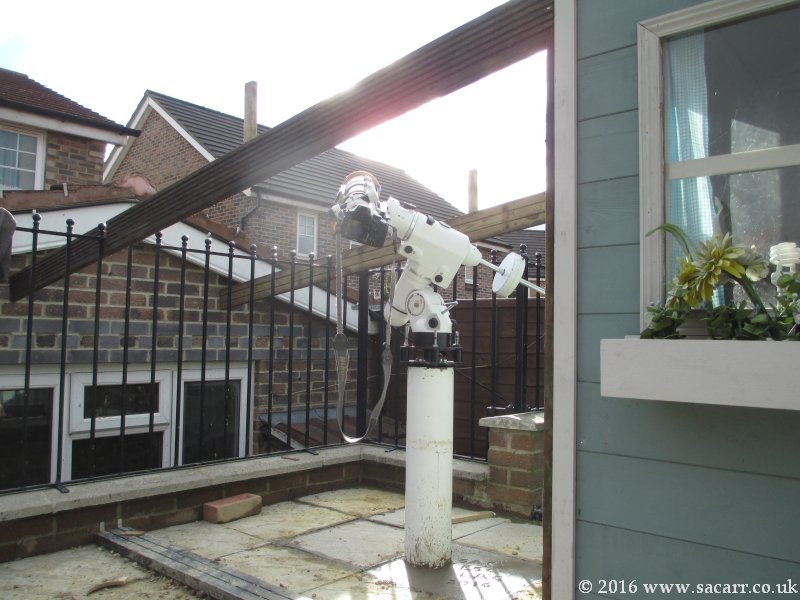 |
 |
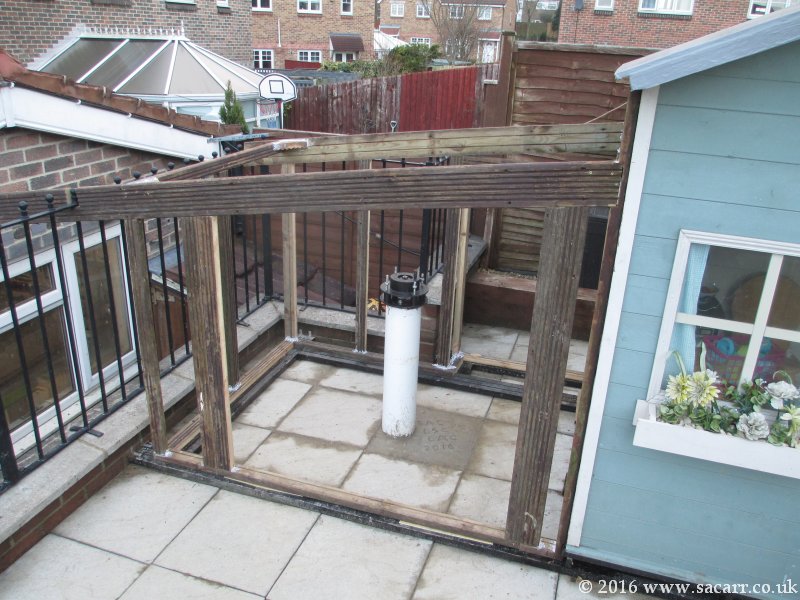
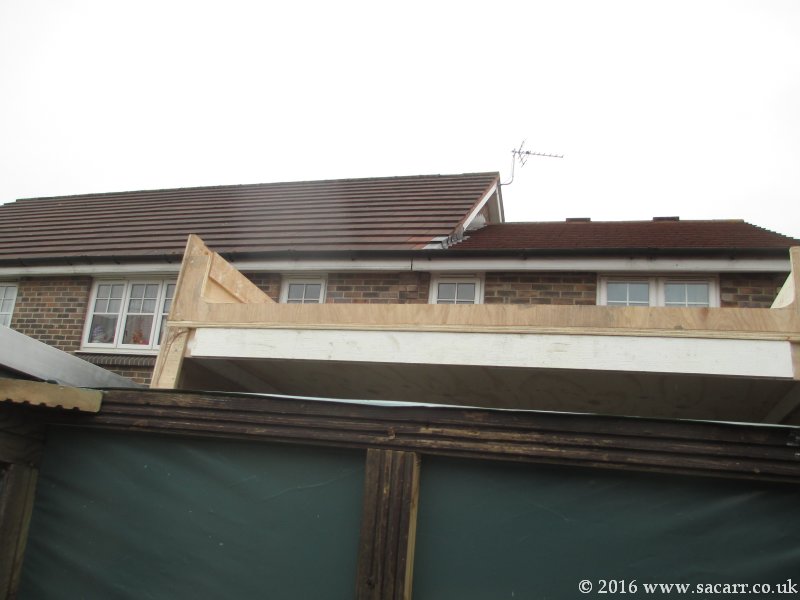
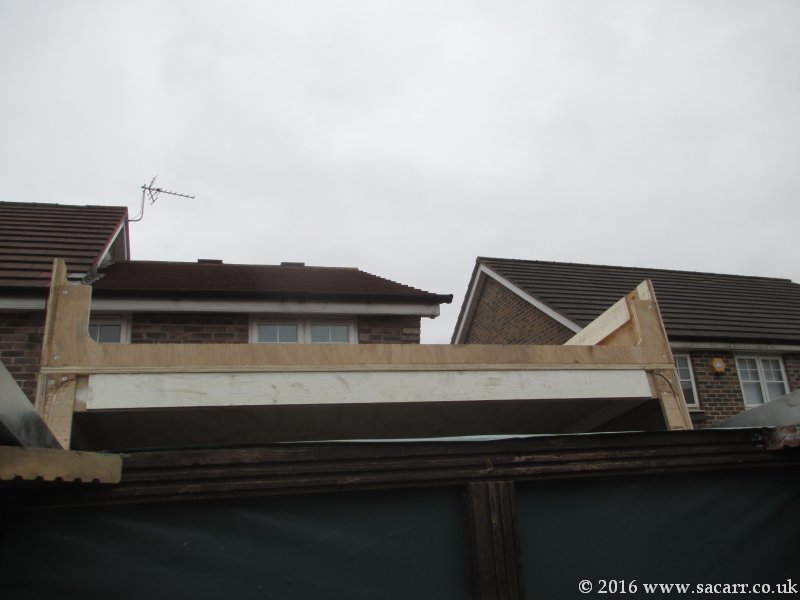
| Mar 10th - After a jig was made for my circular saw, I was able to cut the decking planks down the middle. These smaller timbers were used to frame up the basic structure of the observatory. By the end of the day, most of the structure was complete. |  |
 |
|
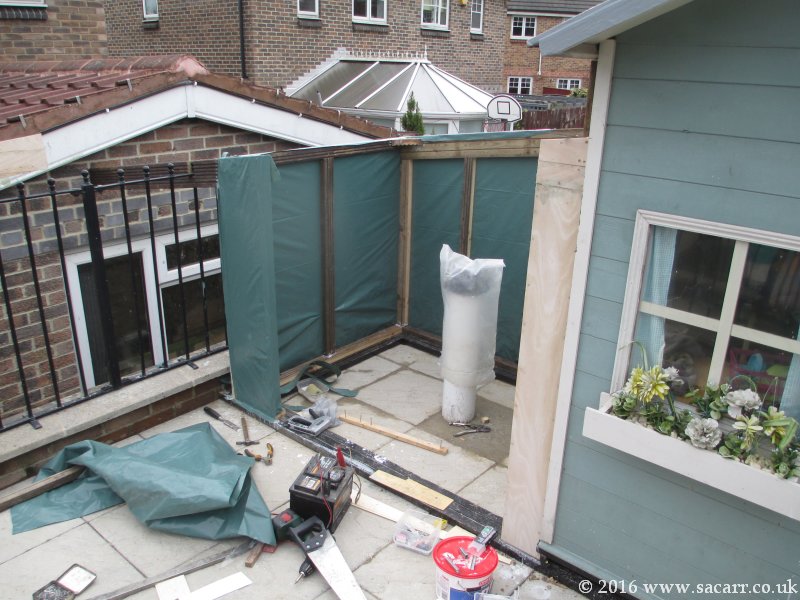
| Mar 11th - The framework was covered in a moisture barrier, stapled in place. For most of the observatory, the cladding would be attached directly over the barrier. On the door section, the framework was skinned in plywood to give additional strength to support the large hanging weight. Several of the low planks were pre-painted, as access was restricted. | |||
 |
 |
 |
 |
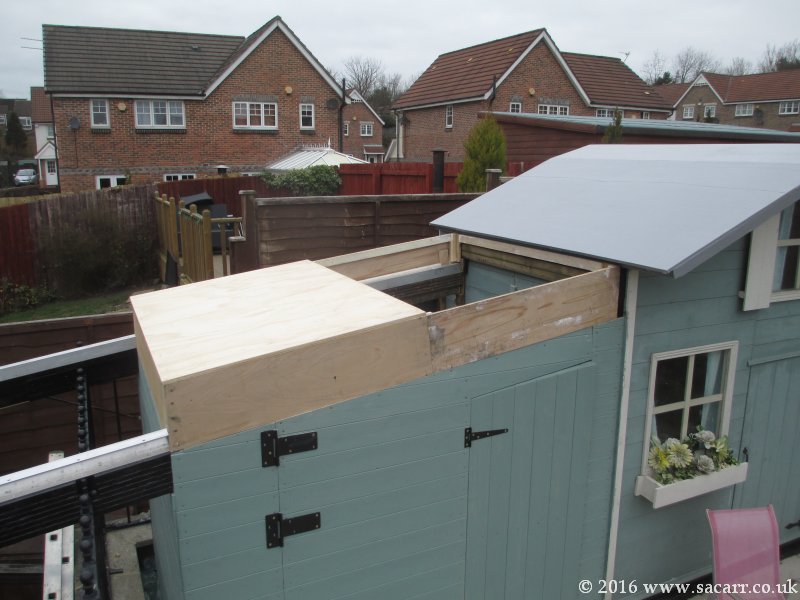
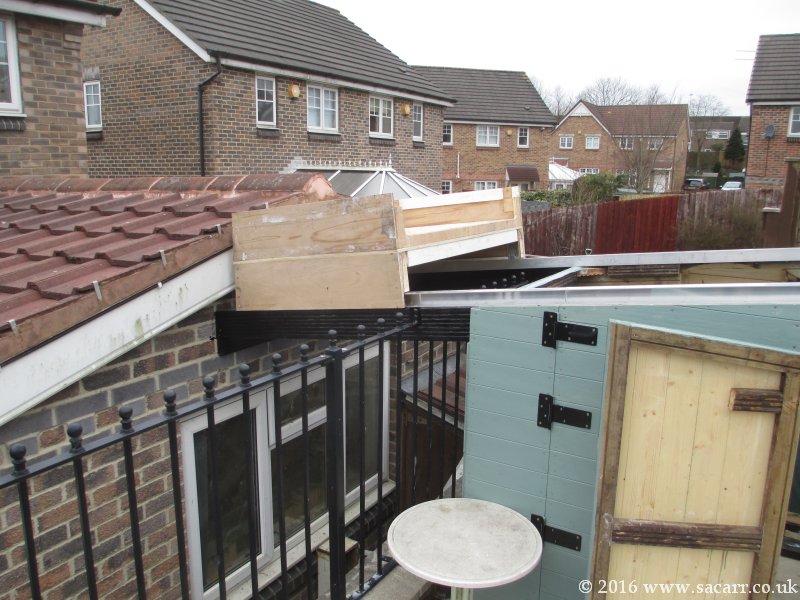
| Mar 12th - Cladding continued around the back of the observatory, but after a test fitting of the 200PDS scope, it was found to be catching the roof runner at some low angles to the East. A box was built on the rear wall to increase clearance space. The workshop side of the obsy was fully clad and most of the main door was clad. | |||
 |
 |
 |
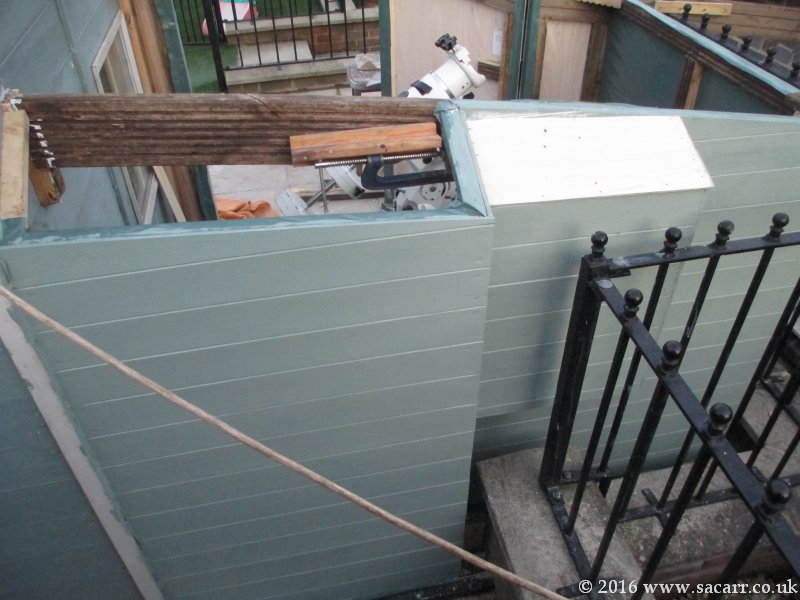 |
| Mar 13th - The cladding was completed on the large door, which was then hung, followed by cladding the remaining strip of wall up the right side of the front wall. Late in the day, I took a few Moon shots from the scope on the pier. The mount wasn't powered at the time. | |||
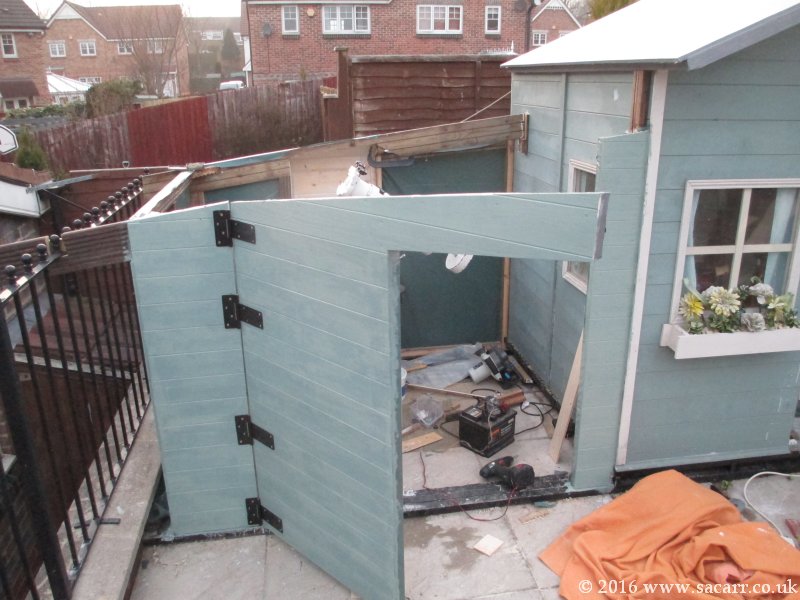 |
 |
 |
 |
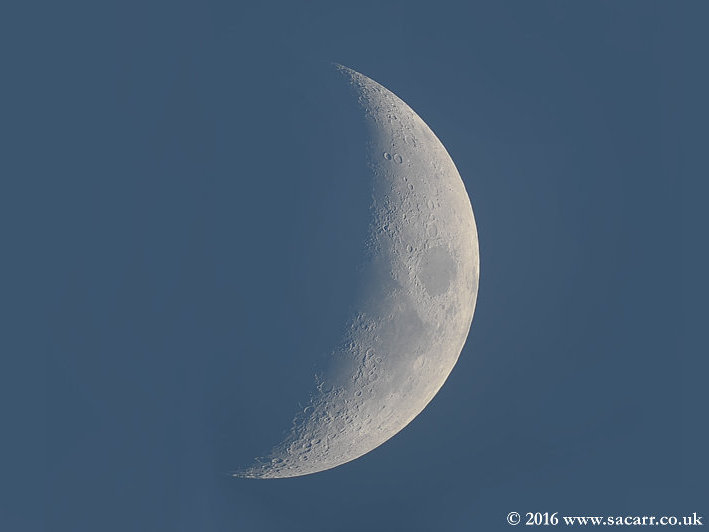 |
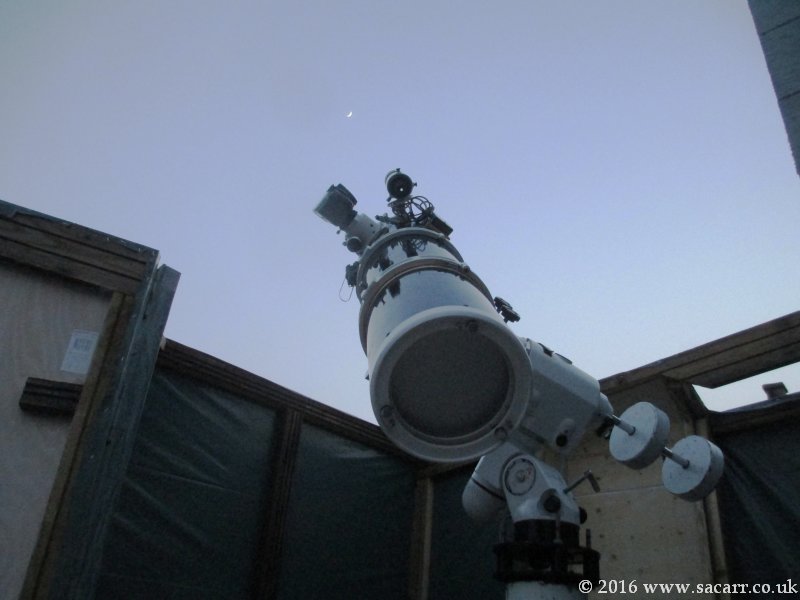
Mar 14th - The frame of the small door was built into the hole in the front wall, with some temporary diagonal bracing to hold it square when removed. Six cladding planks were glued together, slightly over sized, and the frame was glued and nailed to the cladding. Once dry, it was trimmed, painted and hung. The roof runner supports were also painted and properly attached to the workshop wall. Another clear sky allowed the chance to power up the mount and image the Sun and Moon properly for the first time. The following day, the roof hinges were made. | 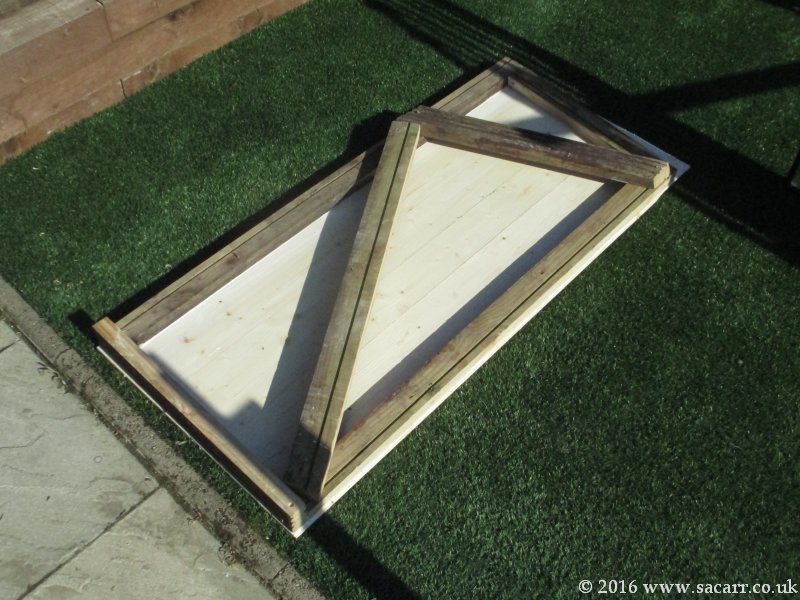 |
|
 |
 |
 |
 |
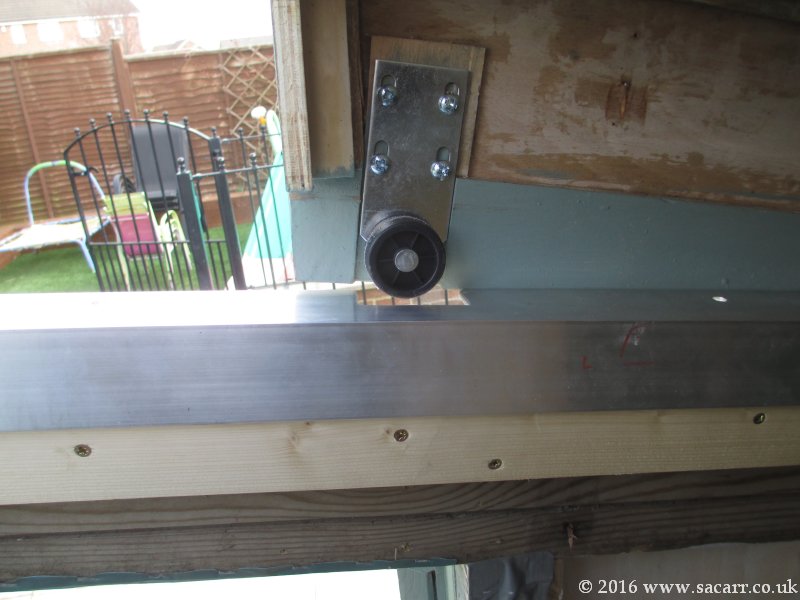
| Mar 16th - I had a few interruptions but got the basic frame for the lower roof made and test fitted on the obsy to check a few things. |  |
Mar
17th - I made the trip to Metal Supermarkets to collect the aluminium
channel for the roof runners. After cutting and fitting the channels,
the wheels were fitted to the frame of the lower roof and it was test
fitted and rolled down the tracks.
|
 |
 |
Mar 18th - The frame for the lower roof was completed and the plywood top was added. I also started the frames for the upper roof section. |  |
Mar 19th - Both roof sections were trial fitted in the closed and open positions. This gave me the chance to check whether it had any impact on the South views. |
 |
 |
 |
 |
| After the testing, the ply top was added to the upper roof, and that was left to dry. I then returned to the lower roof and started attaching the cladding. It was a slow process requiring lots of nails, screws and clamps to attach the slightly warped planks. Several were run under a hot tap to soften them prior to fitting. Last job of the day was to glue on the cotton with dilute waterproof PVA glue. This was the first layer in waterproofing the roof. |  |
 |
|
| Mar 20th - The roof sections were clamped together and the hinges were trial fitted first thing. This required a spacer either side of one roof section to allow the hinge plates to overlap. | 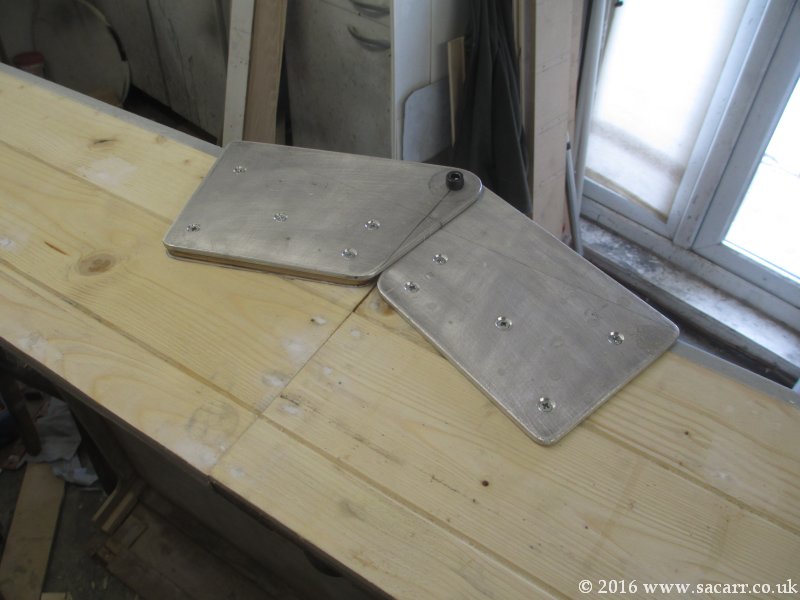 |
 |
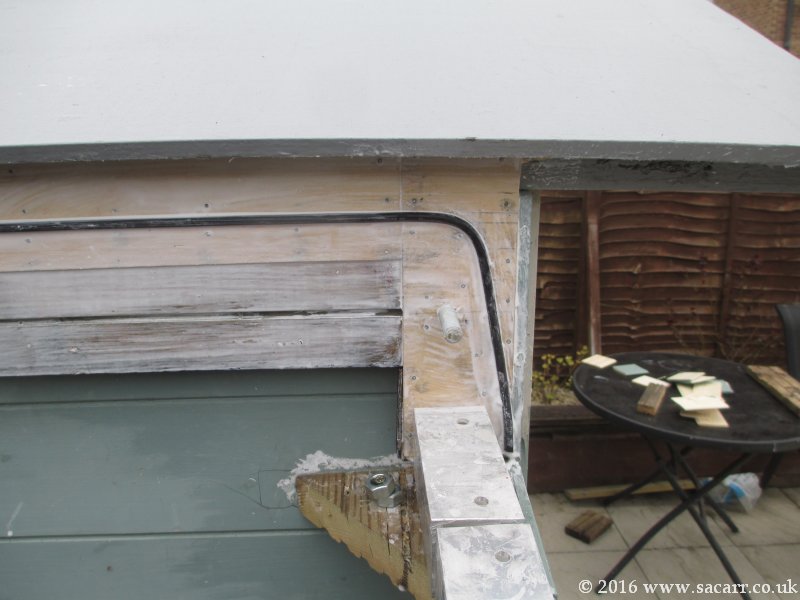
The cladding was then painted in green, and a number of areas around the runners were waterproofed and painted, as they would not be accessible once fitted. The waterproofing overlapping lip between the roof joints was also made and cotton covered. |
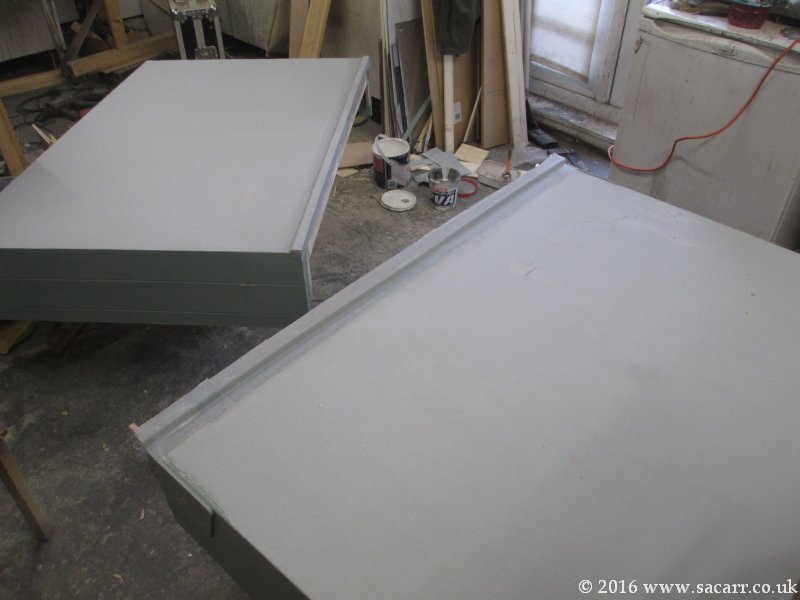 |
While that was drying, I made the roof for the storage area of the observatory using some left over cladding. The last job for the 20th was to give both roof panels two coats of gloss grey paint. | 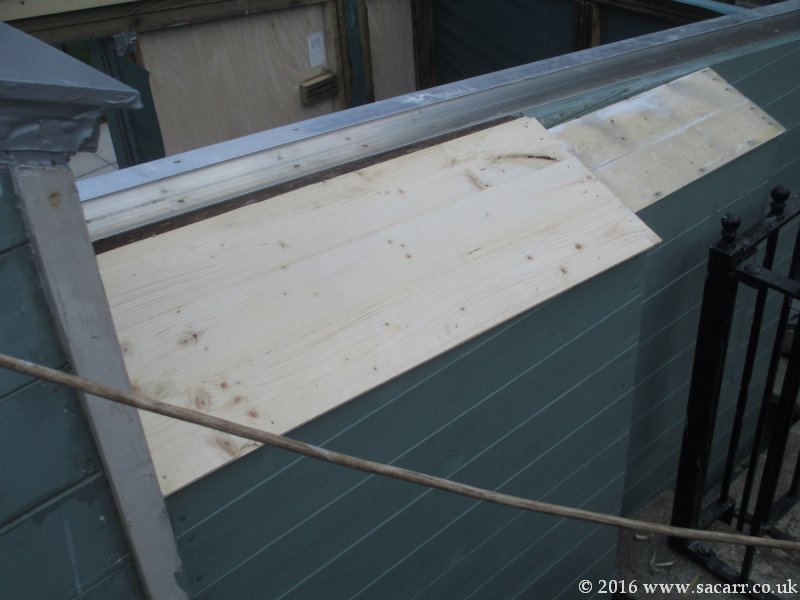 |
 |
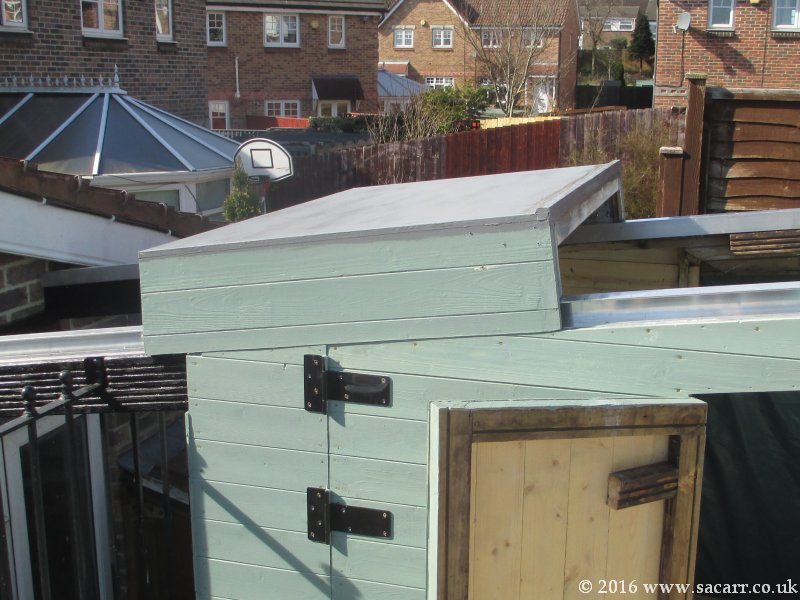
| Mar 21st - I gloss painted the two small roof sections early in the day, to give them plenty of time in the sun to dry. The next big job was to fit the roof panels, starting with the lower roof section. The wheels on one side were dropped into the channels, and it was lowered into position. The other wheels were then slotted into the channel under the edge of the roof and screwed in place. The second roof panel was then fitted, but at this point, the whole roof was now trapped and while it could slide, it couldn't lift. | 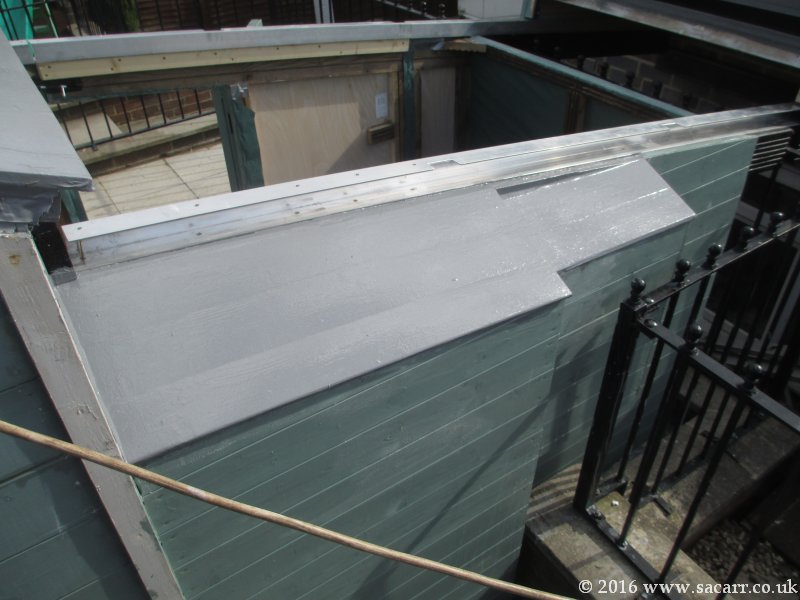 |
 |
|
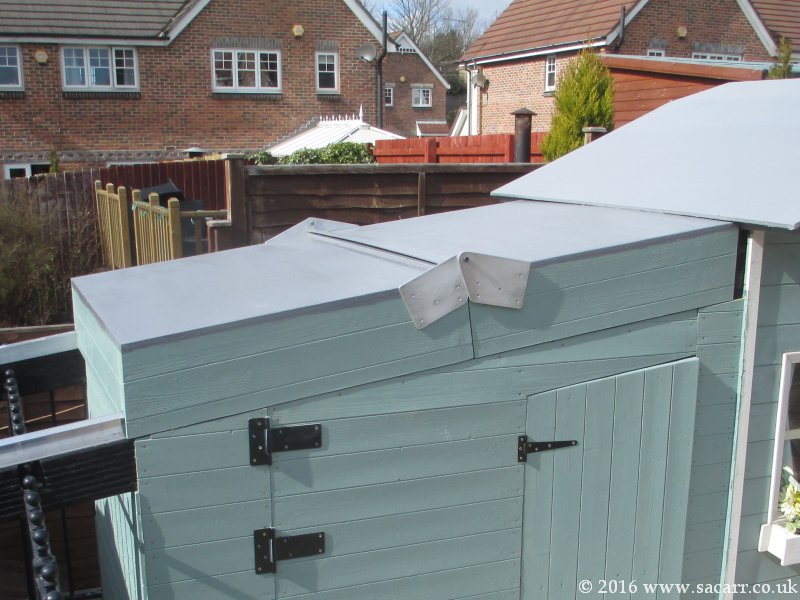 |
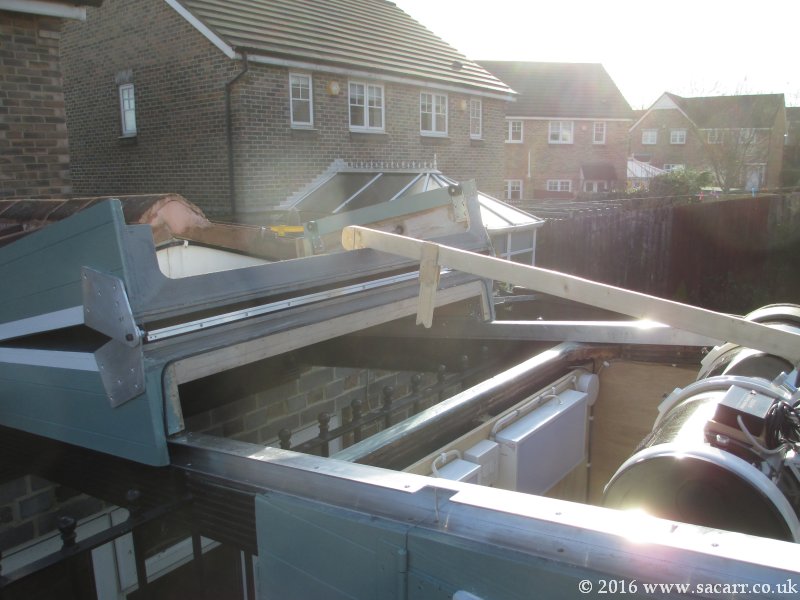
To allow the upper roof to lift and fold, I needed to cut slots into the top of the runners to allow the wheels to lift up and out. I slid the roof sections to a convenient position for opening. I also made sure the slots wouldn't fall in any of the wheels parked positions when the roof was closed. They were marked and then the slots hack-sawed out and the slots cleaned up with a file. The next three pictures show the slot and the wheels lifting clear. | 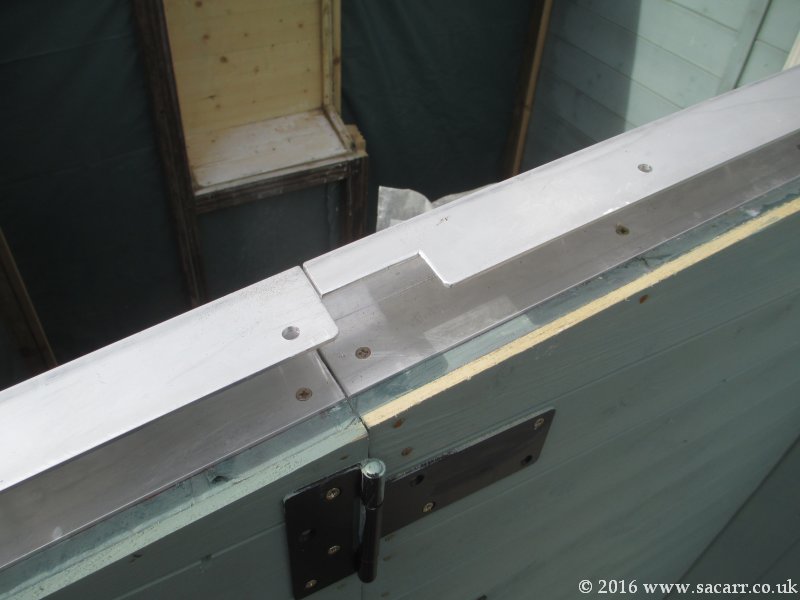 |
|
 |
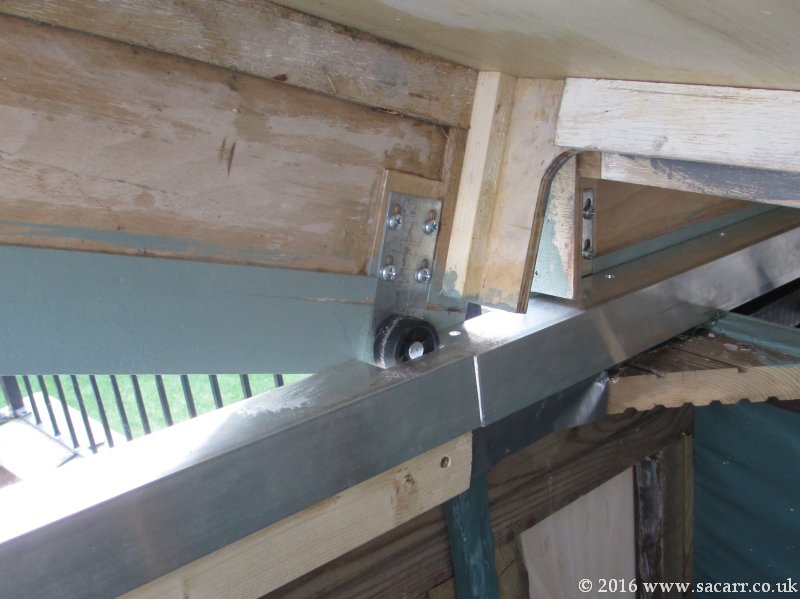 |
With the slots cut, the upper part of the roof was clear to lift out of the runners and fold over on top of the other roof. With it open and pushed right down the track, the roof is below the roof line of the house, and so shouldn't interfere with the views. | 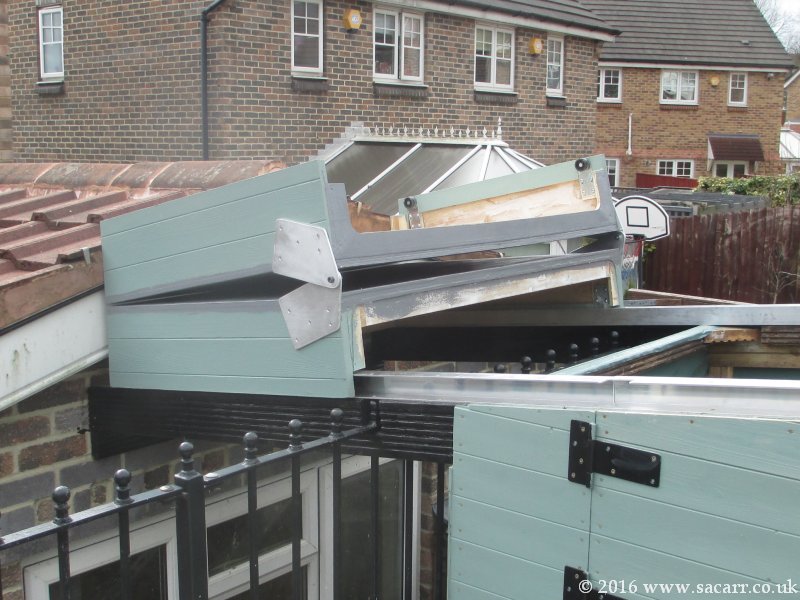 |
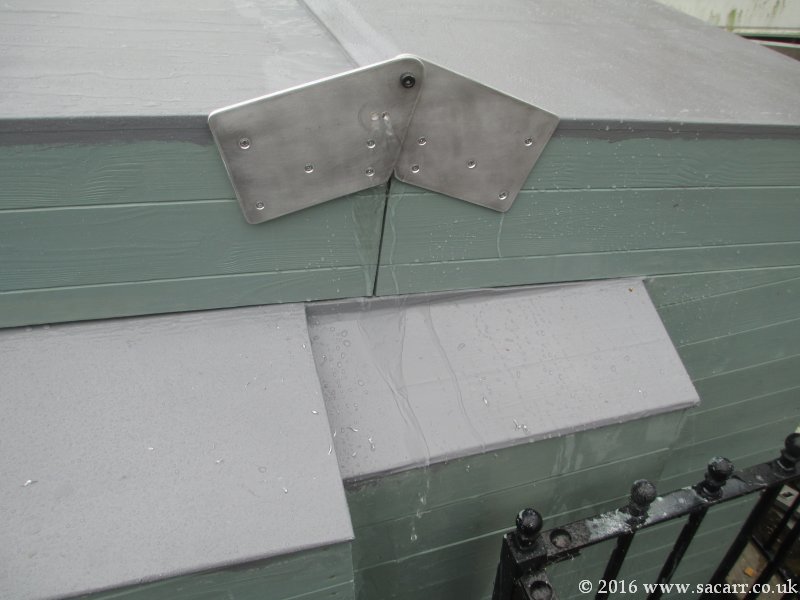
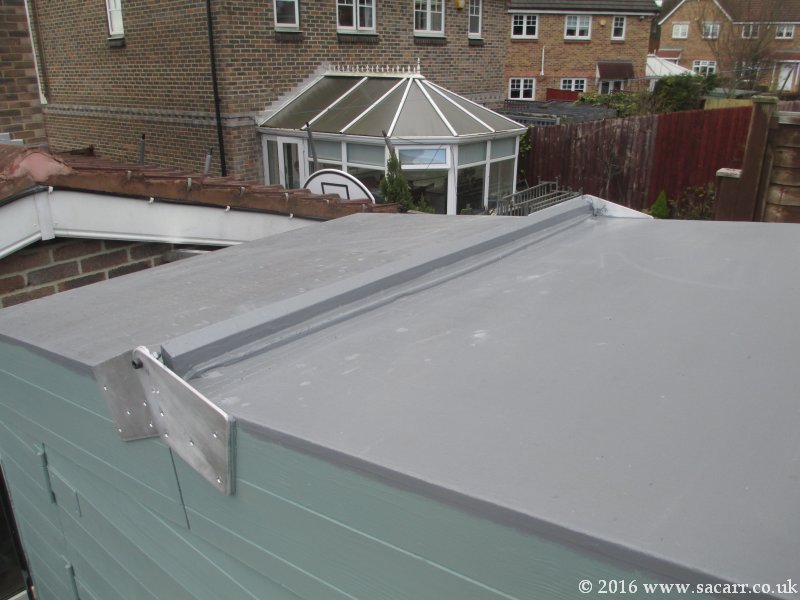
| To hold the roof closed, I drilled the play house end wall and fitted two M12 bolts for the roof to slide over. Nuts would then clamp the roof closed against the wall. At the end of the day, the observatory was looking quite complete. | 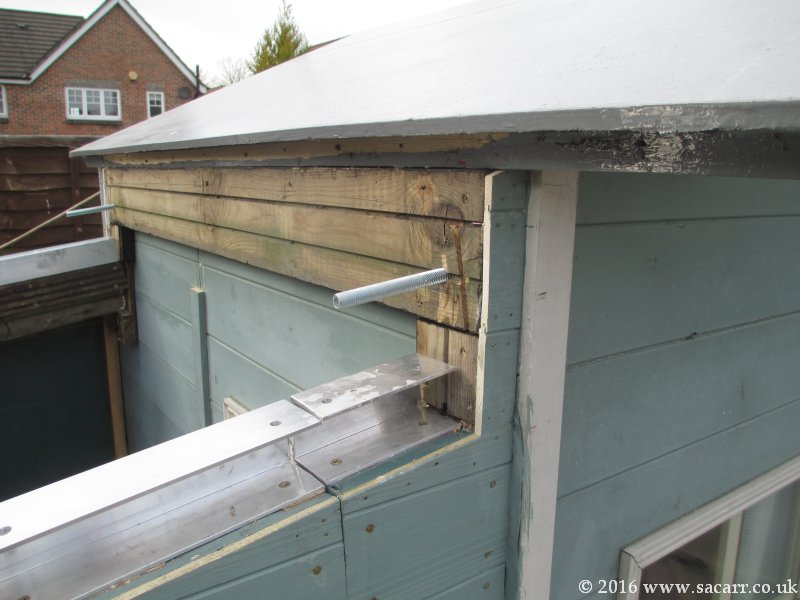 |
 |
 |
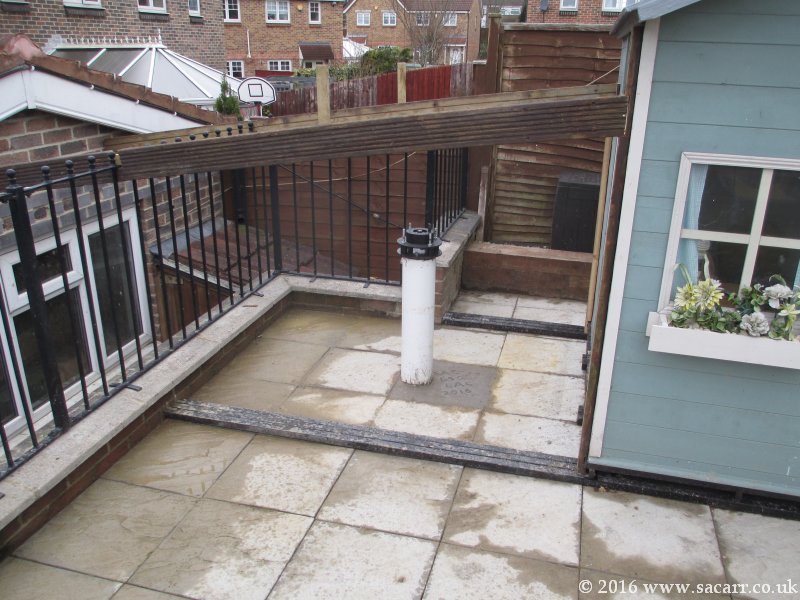
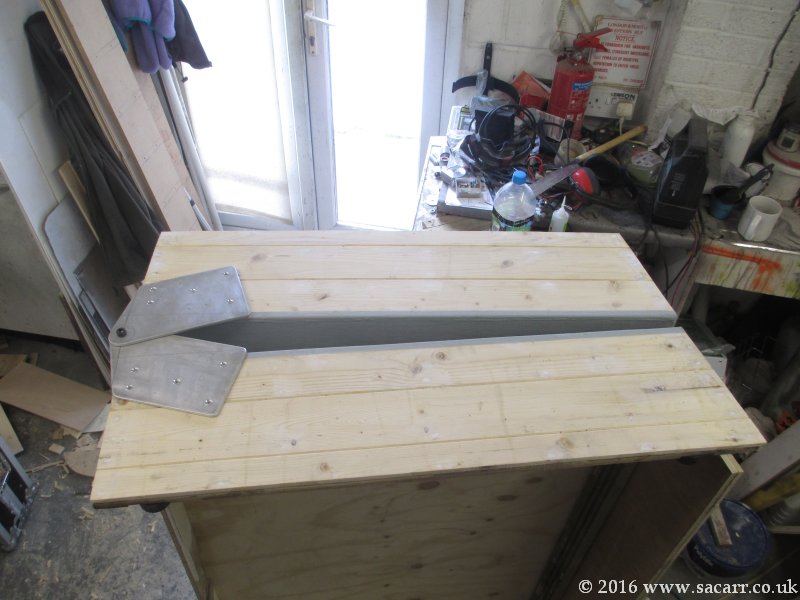
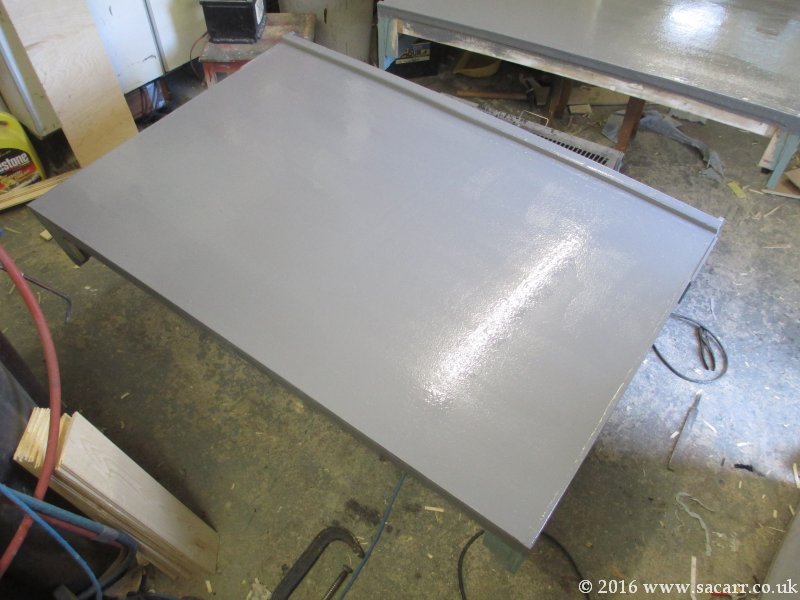
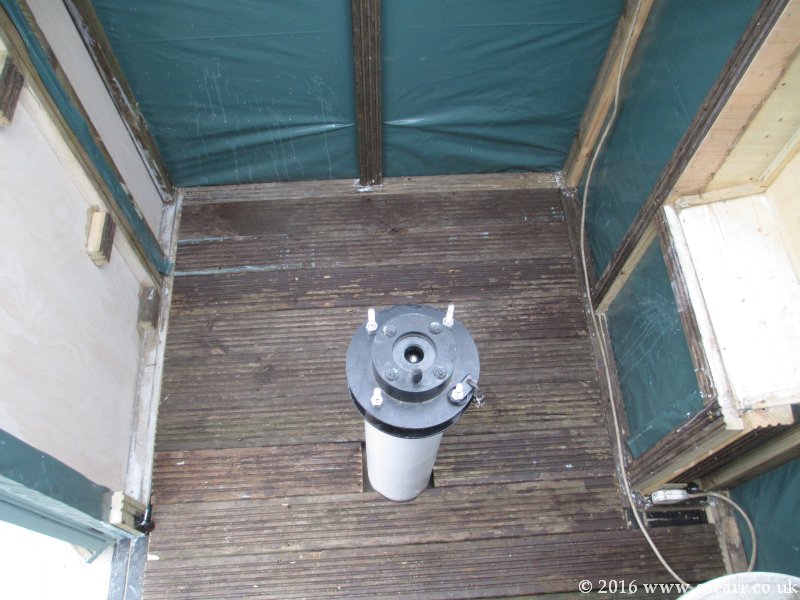
| Mar 23rd - With the play house consuming a large number of the decking planks, I as beginning to wonder if there would be enough left for the observatory floor. As it happens, there was, but only just! The floor planks were cut and trimmed to fit around the pier. As yet, they haven't been painted, but need the undersides painting in bitumen paint, and perhaps the upper surface in anti-slip paint. | 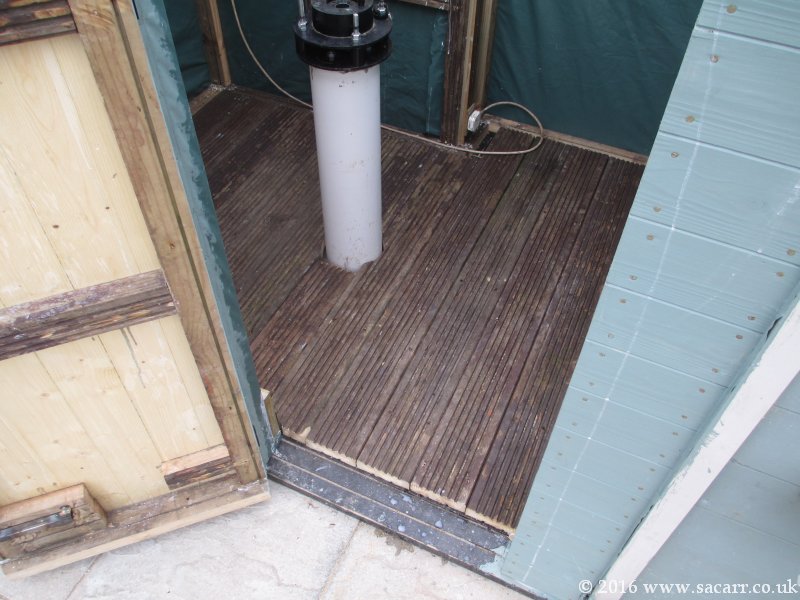 |
 |
|
 |
 |
The
mains power was re-routed from the play house to the observatory, though
only in a temporary location. I'll need to wire in sockets and some
lighting, but their final position hasn't decided.
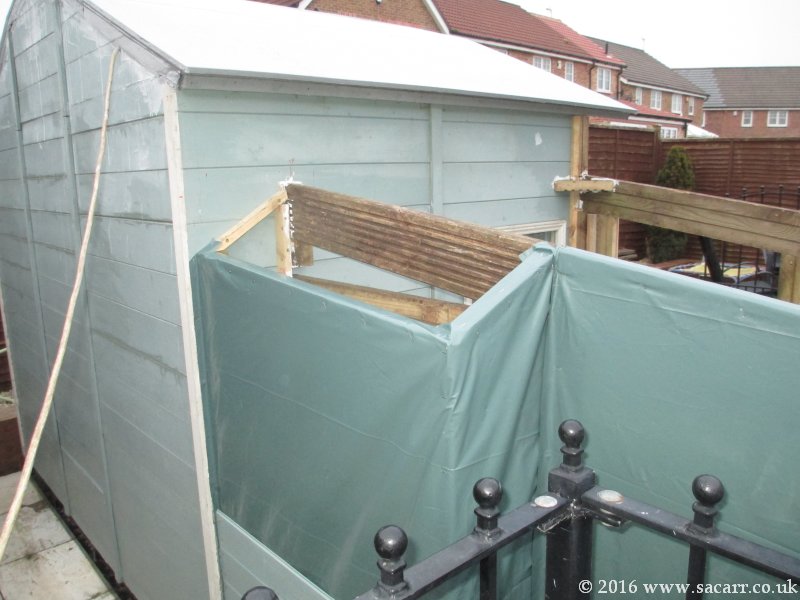
The rubber seals were also fitted to the roof sections. They sit in slight slots in the ply and are superglued in place. |
|
| Mar 24th - I did some artificial rain testing with the hose today. Overall, the observatory performed quite well. A couple of cladding planks were leaking at a joint on the small extension, but that's easy enough to seal. At certain angles with the hose driving water into the centre roof joint, it was leaking a little, so I have a few little tweaks to do to that, but in general, the leak test was fairly successful. | 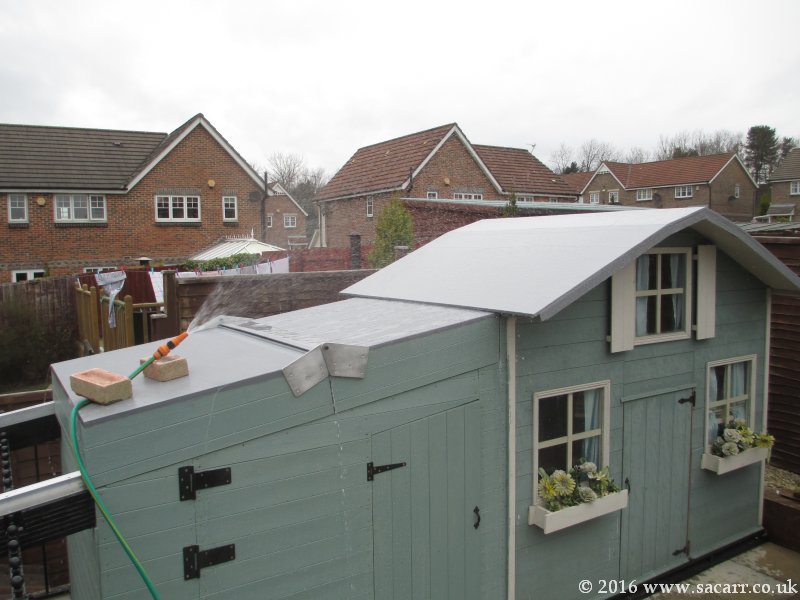 |
 |
|
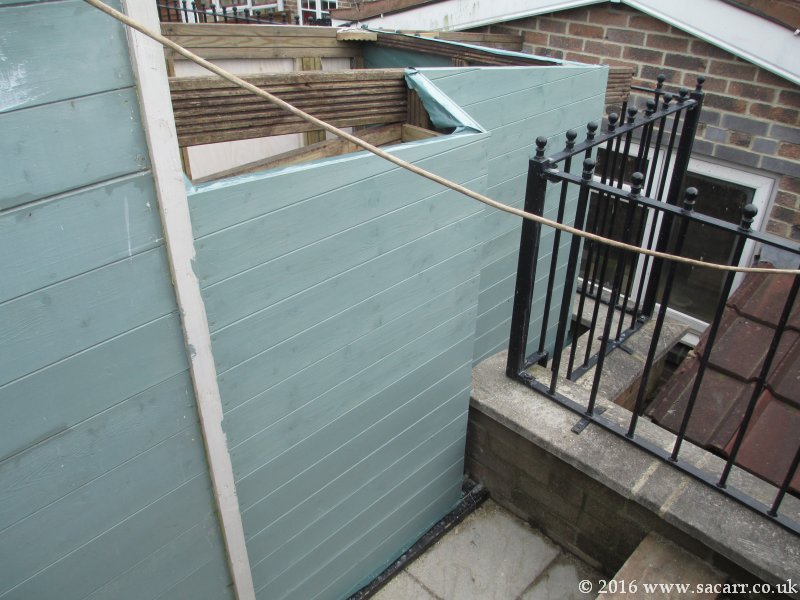
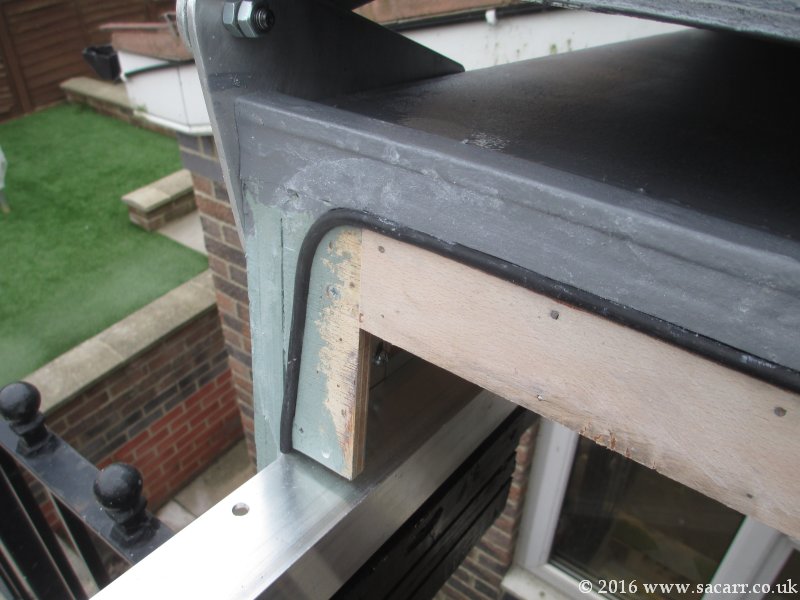
| Mar 25th - I was out with the family in the morning, but later in the afternoon, I got back to work. No pictures, but the time was spent making a new overlapping joint for the roof join. By the end of the day, it was fitted, and partly covered in fabric. | |||
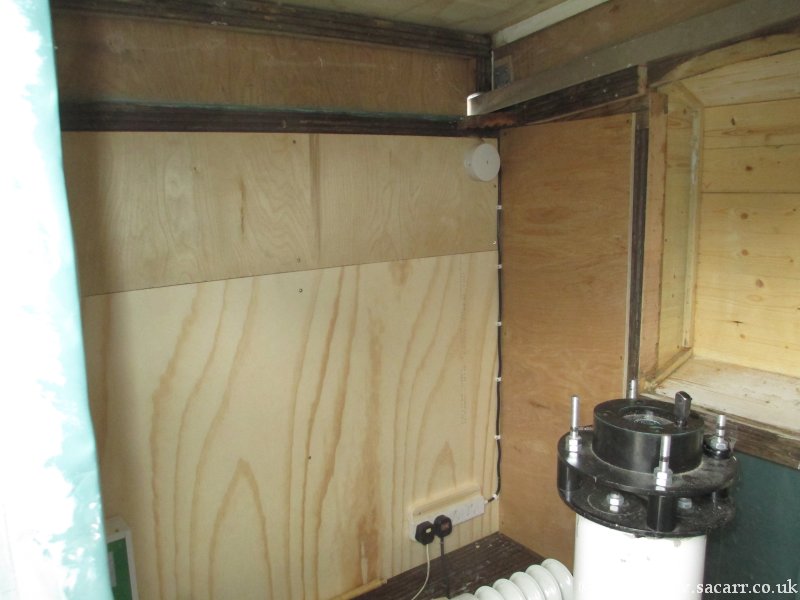 |
Mar 26th - The rest of the new roof joint was covered in fabric, but the forecast wasn't great for the day, with heavy rain arriving later. The roof seal once done, was covered in plastic to protect the glue while it cured. In the mean time, I started some work inside. The wall on the workshop side, and part to the right, was skinned in left over 1/2 inch ply wood. This gave me a nice firm wall to attach the electrical junction box and four gang socket. | 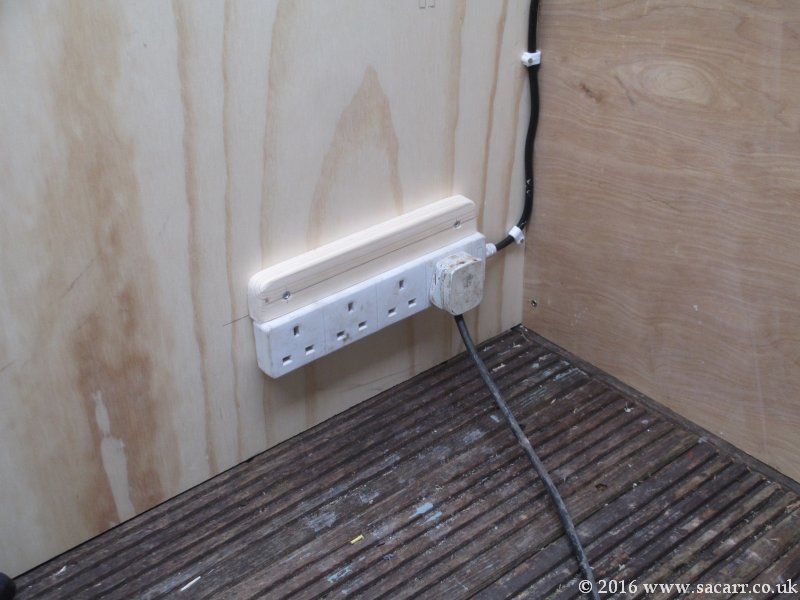 |
|
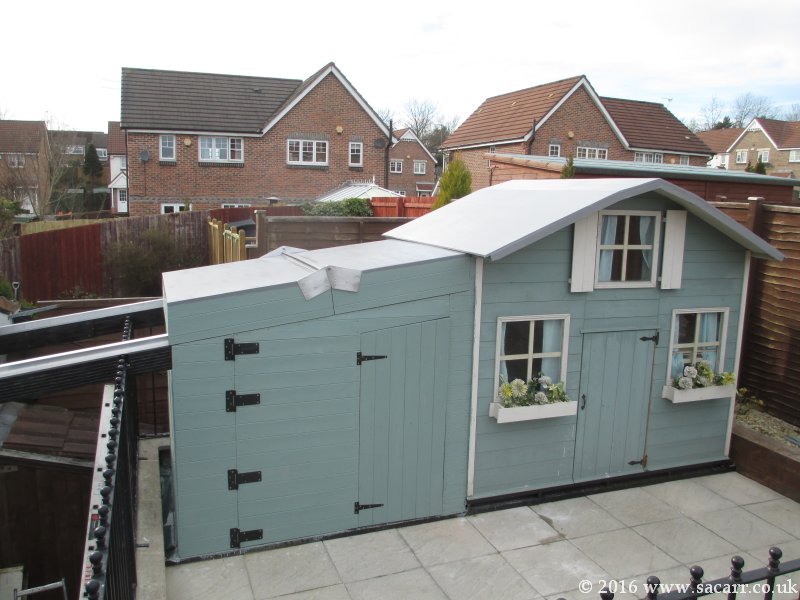
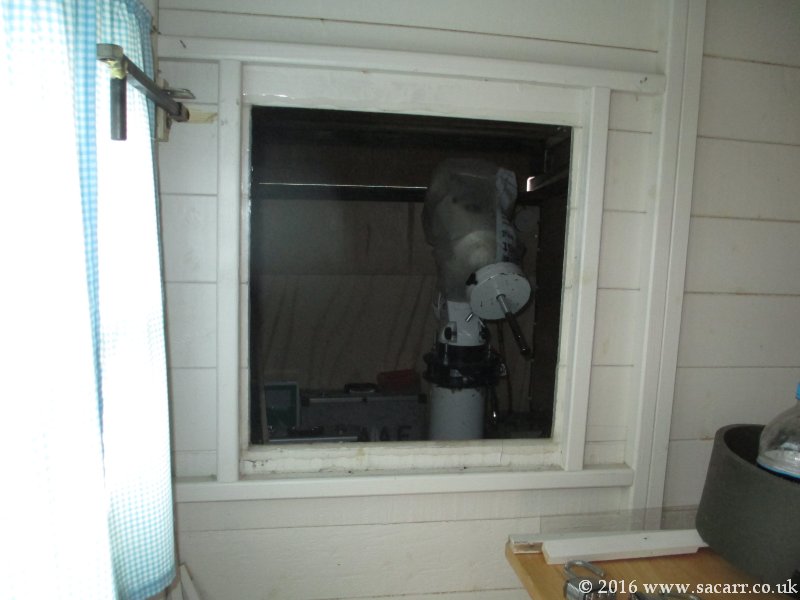
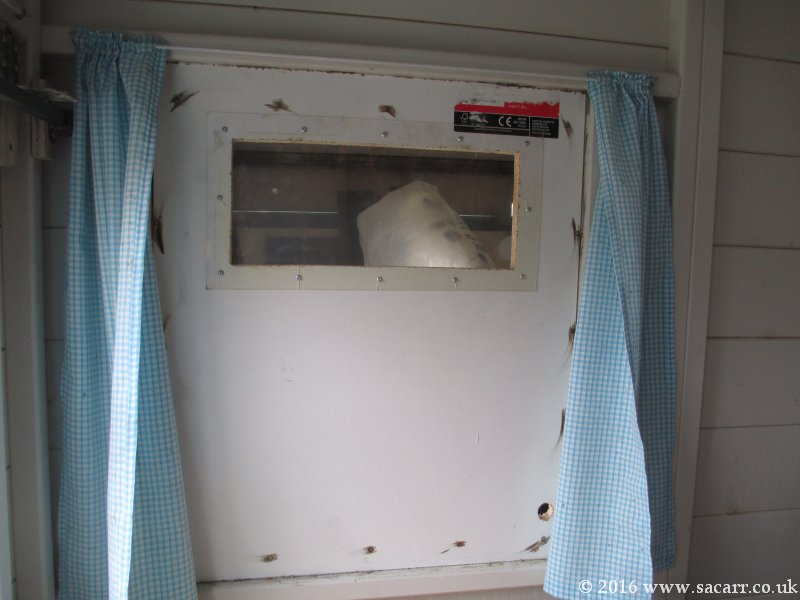
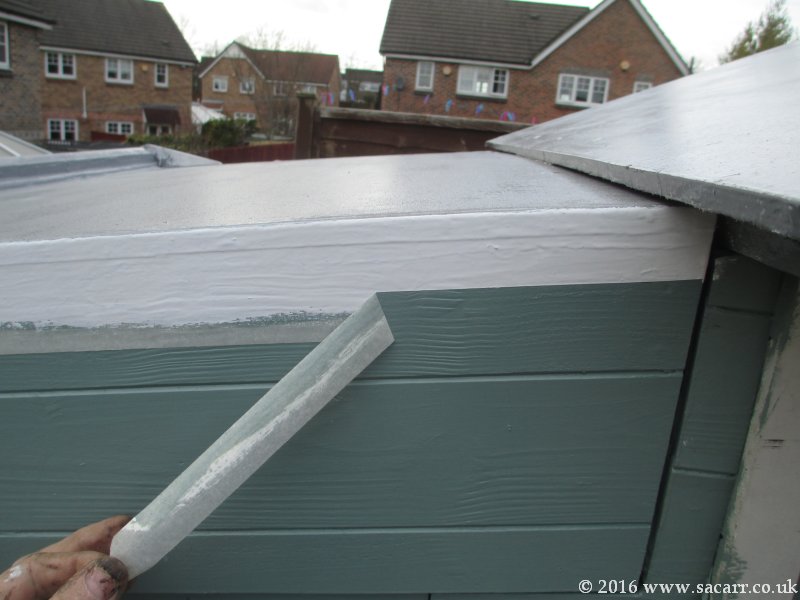
| Mar 27th & 28th - The observatory was painted another couple of coats all round and the big door hinges painted over. The roof seal was also reworked as at certain angles of simulated rain, there was a slight leak. Inside, the adjoining window was removed and for security, a wooden panel was fitted with a small 'Mission Control' window for monitoring during deep sky imaging. The flooring was also painted with bitumen paint on the underside, and left to bake in the observatory with a heater on. The white trim was also painted along the roof line to match the play house when they are refitted. | 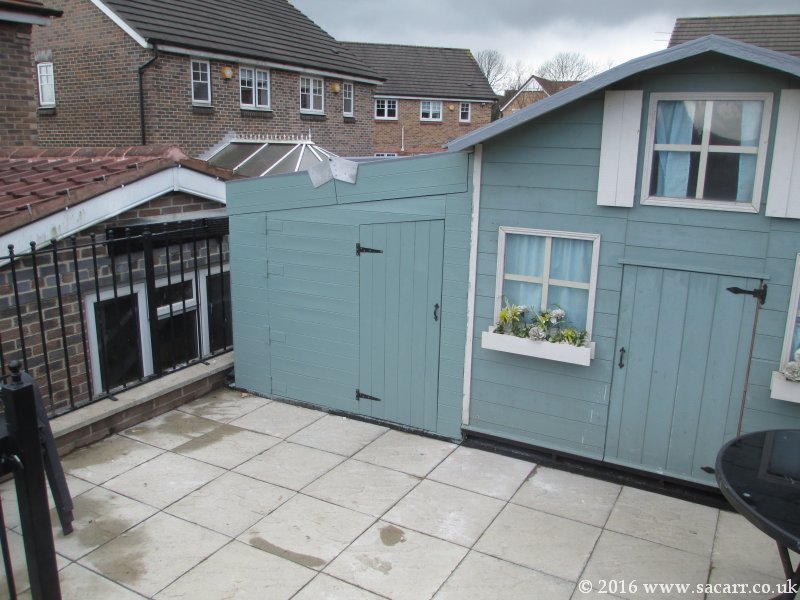 |
 |
|
 |
 |
 |
 |
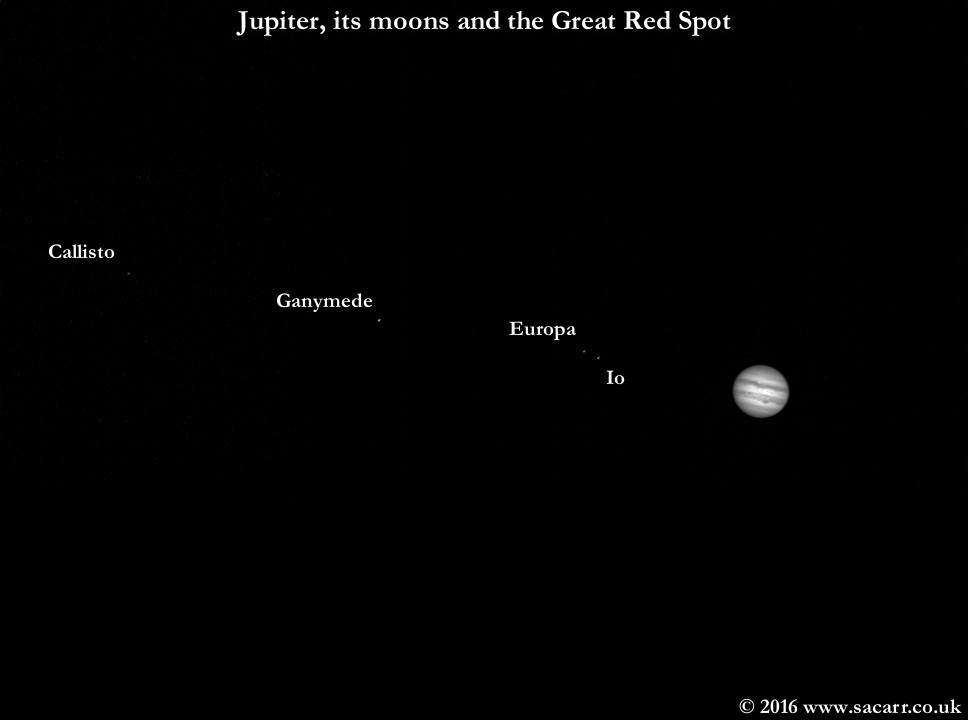
| On the evening of the 28th, it was partially clear, so I fitted the 200PDS for some Jupiter imaging. Thin cloud and patches of thicker cloud spoiled the views, but I did manage some reasonable close ups and one shot with all the moons strung out to one side of Jupiter with the GRS showing. | 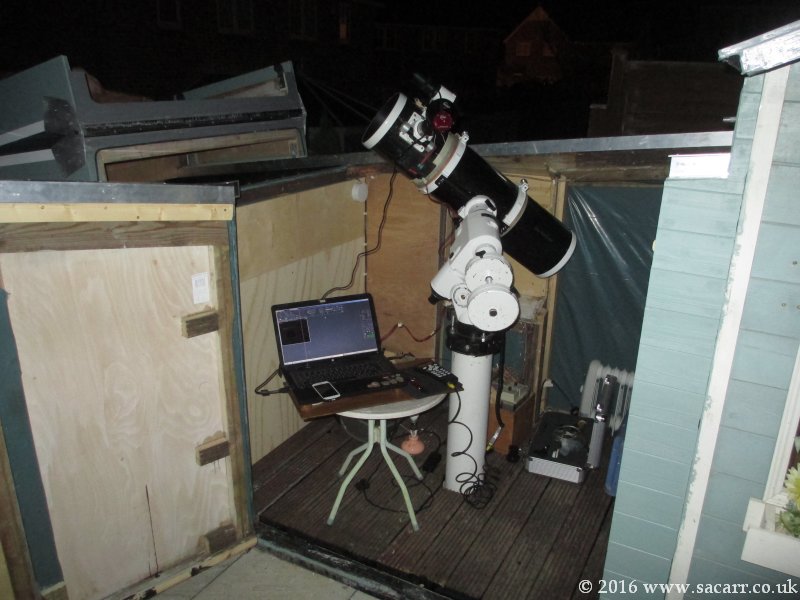 |
 |
 |
 |
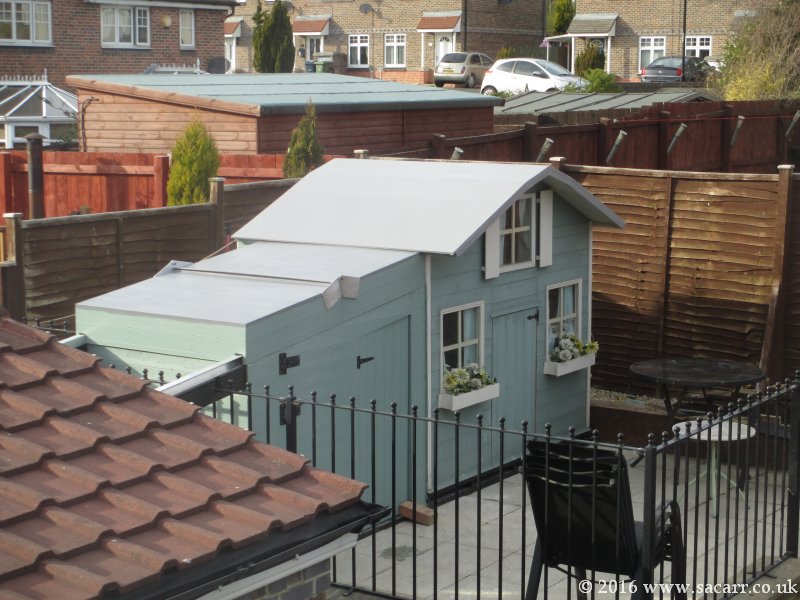
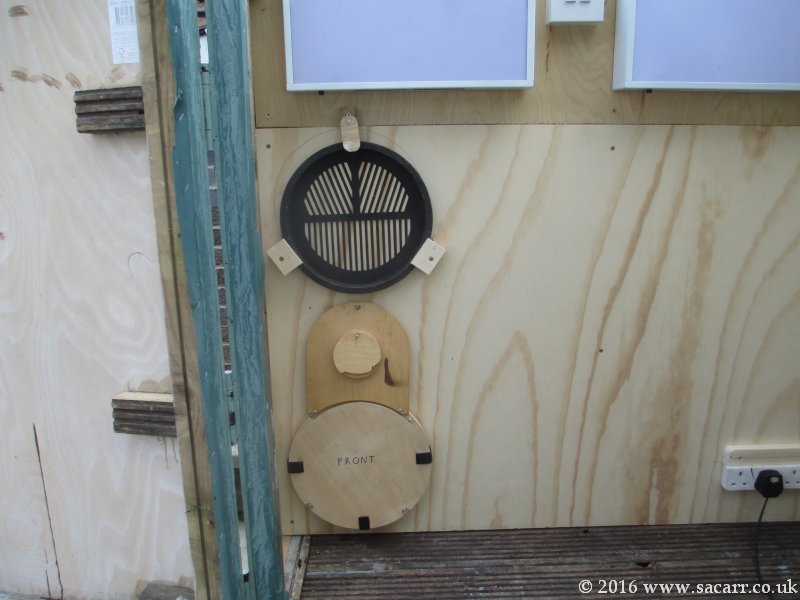
Mar 29th - I painted the removed window frames the day before so that on the 29th, they could be fitted. They were glued and screwed to the large door, and then the gaps in the cladding planks were filled. Once dry and sanded, the window was painted a gloss dark grey and left to dry. To aid opening and closing the roof when the large scope was fitted, I made a multi-function stick that was a hook and a lever. This lever hugely reduces the effort in folding the roof sections. Red and white lights were also fitted to the wall, together with a dual switch. The white will double as a flat field panel. | 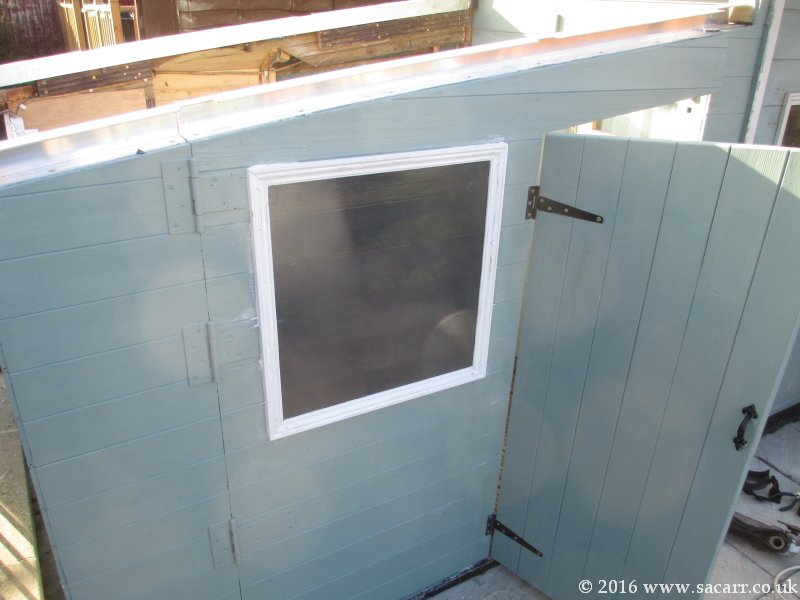 |
|
 |
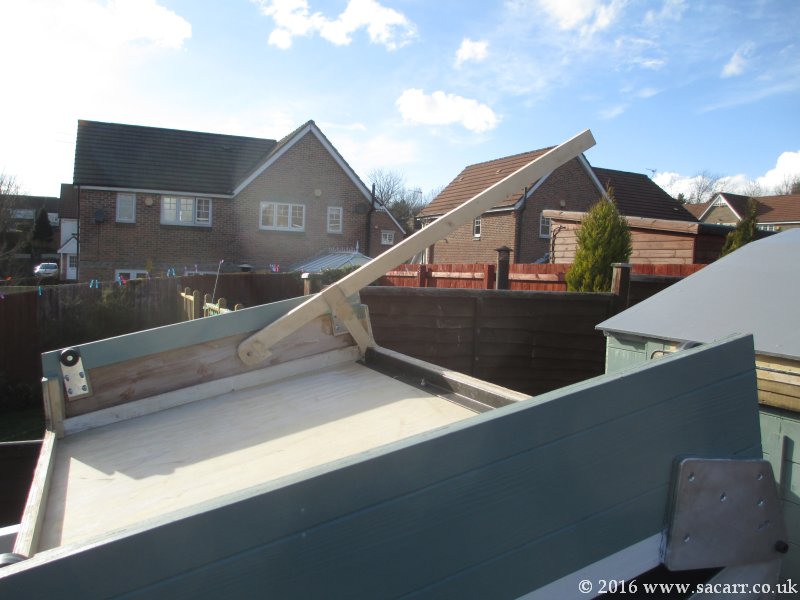 |
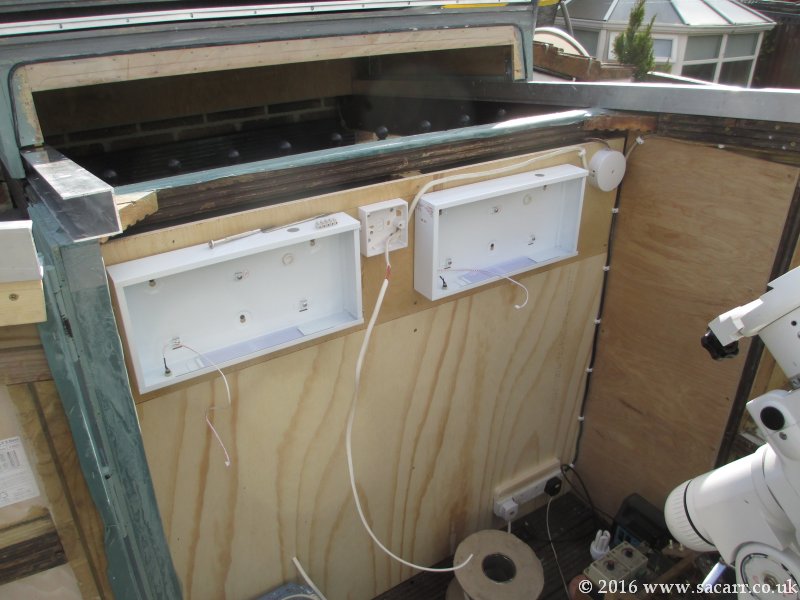 |
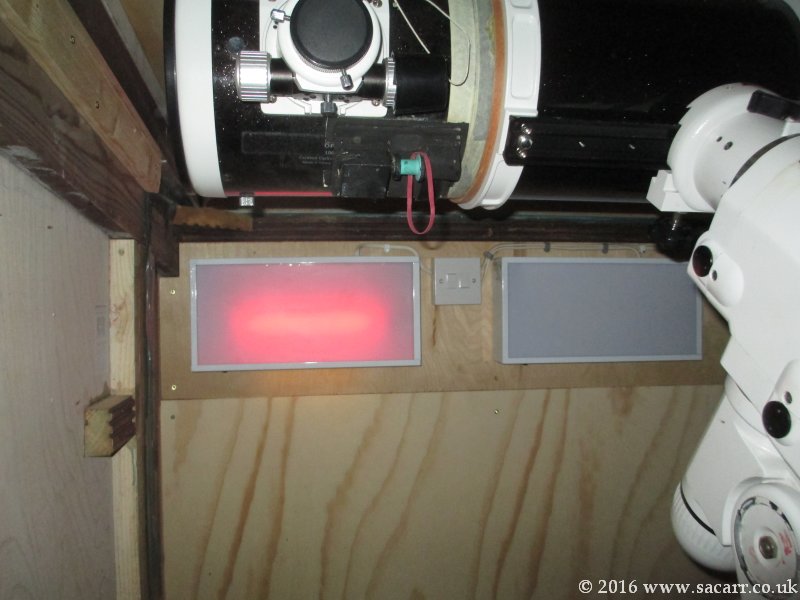 |
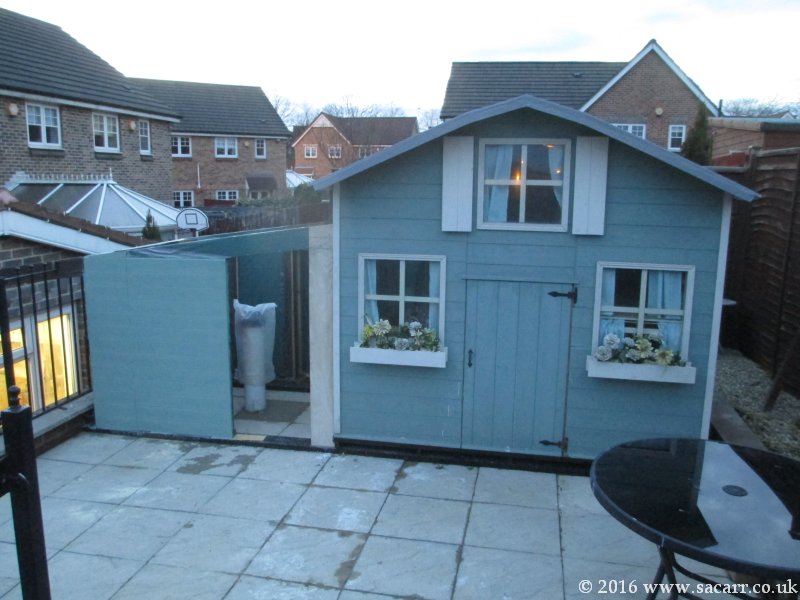
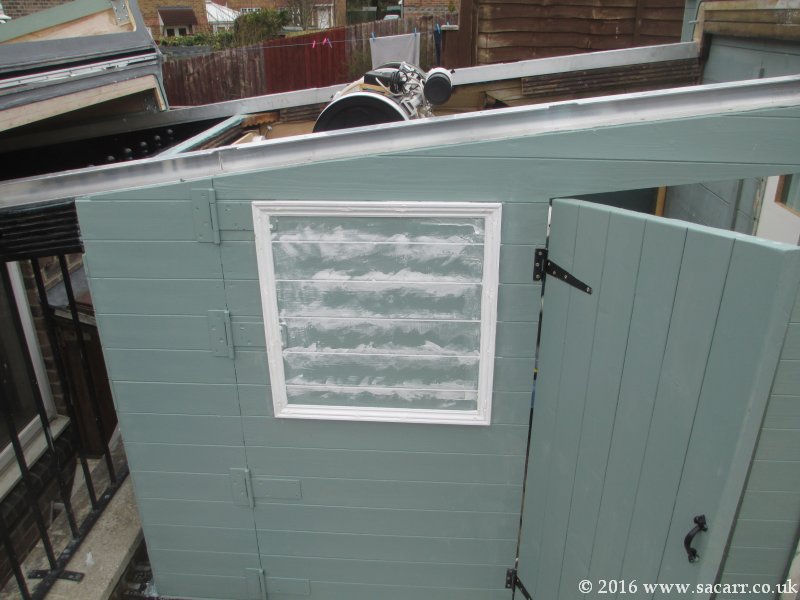
| Externally,
the observatory was done with the fitting of the small cross bars in the
window, however, there were still some small jobs to be done inside.
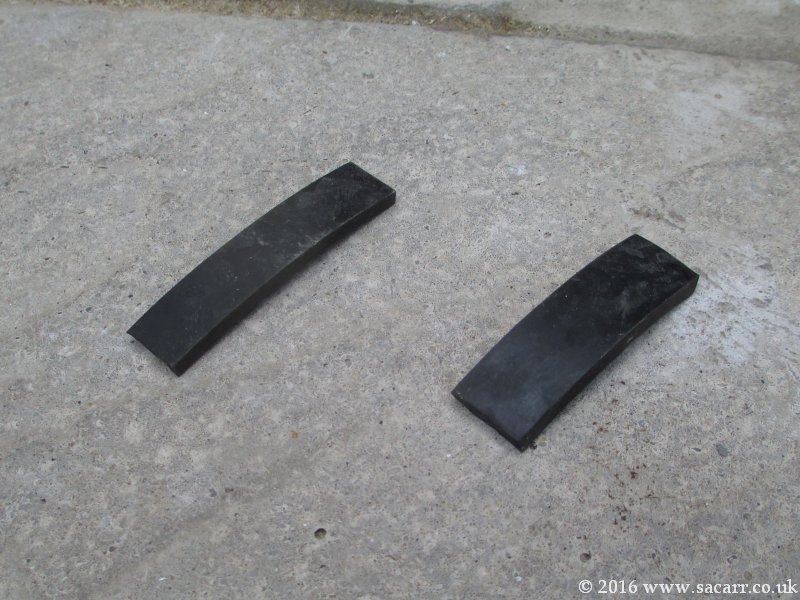
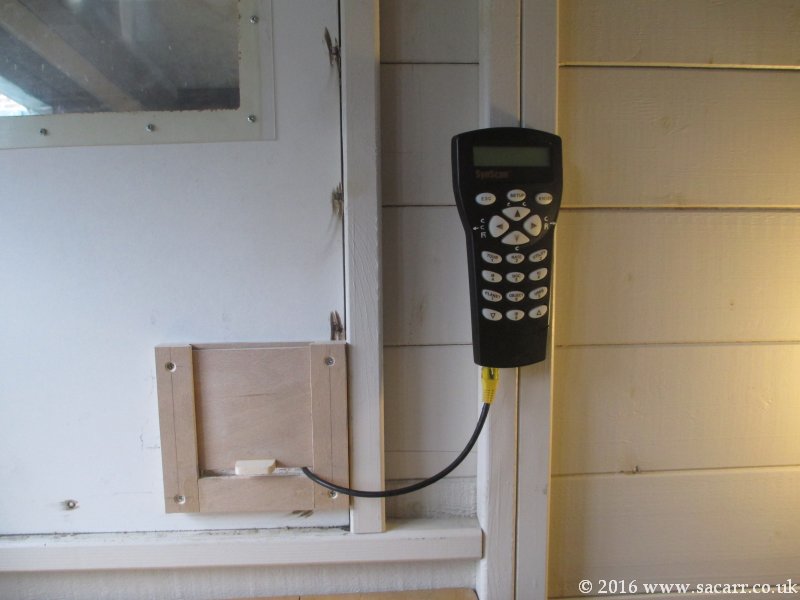
Mar 30th - The floor needed some additional joists before being screwed down, so they were cut and painted. I used some flat rubber strips to act as shock absorbers under them. The gaps in the floor around the pier were covered. The Goto handset was attached to the pier with Velcro and I started moving astro kit inside! |
 |
 |
|
 |
 |
 |
 |
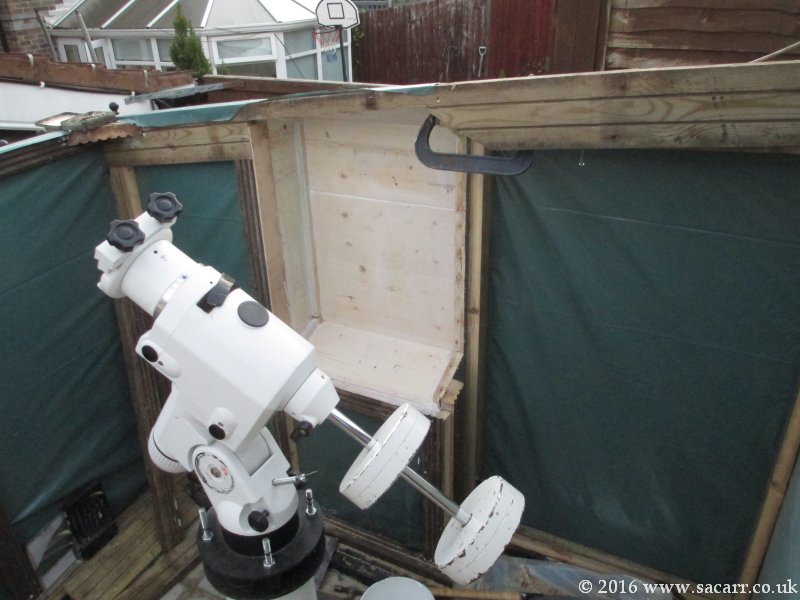
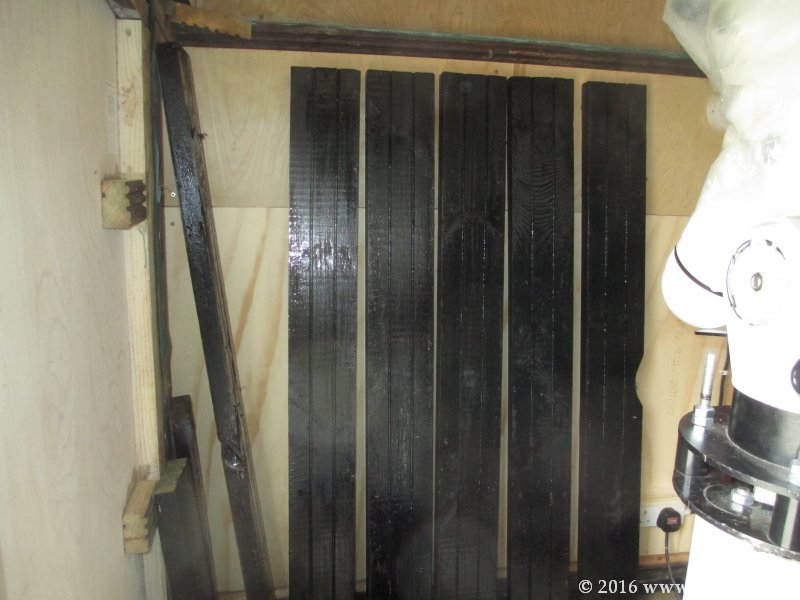
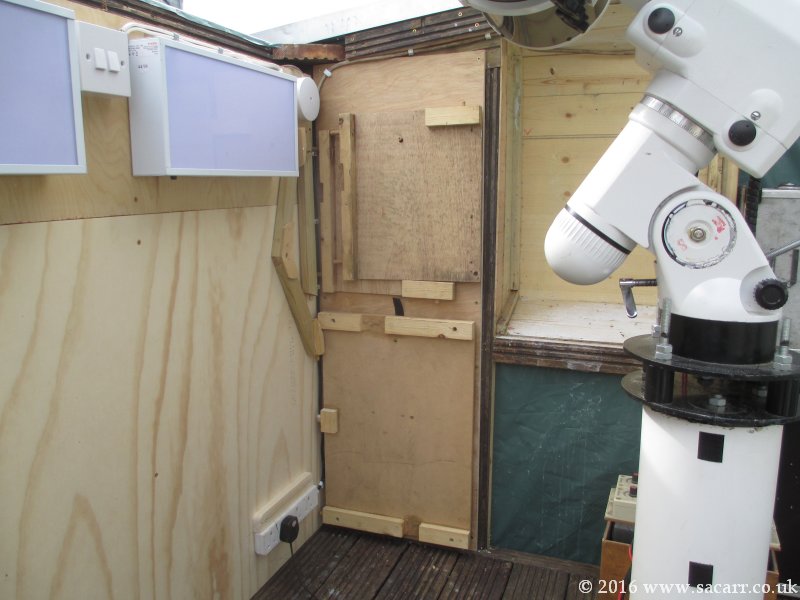
| The flight case for the NEQ6 and the case for the ancient guiding laptop fitted in the storage alcove, along with the tripod and roof stick. The wooden box that shades the laptop when solar imaging was flatpacked and hung from the wall in the far left corner. Near to the large door, I hung the bahtinov mask and solar filter. | |||
 |
|
I
also made a small 'catflap' in the play house wall so I could pass the
Goto handset through into the warm room for when I'm deep sky imaging.
So other than a few touch ups and painting the play house, it's done! |
 |